| |
| chp3. Python的資料型別 |
| 1.整數 |
2.浮點數 |
3.字串 |
4.布林值 |
4.變數的資料型態:type(變數) |
| 5.印出變數的資料型態:type(變數) |
範例3-1 |
6.變數 |
範例3-2 |
7.算術運算子 |
| 8.變數遞增,遞減(再加上,再減去) |
9.比較運算子 |
10.邏輯運算子 |
11.in與is運算子 |
範例3-3 |
pyhon變數不需要宣告 |
pyhon的變數不需要宣告,即可以使用,系統會根據指定值來設定變數型態
a = 5
b = "apple"
|
變數設定值可以多個變數一起設定 |
pyhon的變數設定值,可以多個值在一行一起設定:
a = b = c = 5
name,price = "apple",30
|
變數名稱不可設定成這些保留字 |
pyhon變數名稱不可設定成這些保留字:
False,None,True,and,as,assert,break,class,continue,def,del,elif,else,except,finally,for,from,global,if,import,in,is,lambda,nonlocal,not,or,pass,raise,return,try,while,with,yield
|
pyhon 3.x版本的變數支援中文名稱 |
pyhon 3.x版本的變數支援中文名稱
但最好不要用中文變數名稱
|
pyhon 脫逸字元,跳脫字元 |
pyhon 脫逸字元,跳脫字元有下列幾個\:
\\ = 反斜線
\' = 單引號
\" = 雙引號
\a = 鈴聲
\b = 倒退
\f = 換頁
\n = 換列
\r = 返回
\t = 水平跳格
\v = 垂直跳格
\N{id} = Unicode資料庫ID
\uhhhh = Unicode 16位元之十六進位值
\Uhhhh = Unicode 32位元之十六進位值
\xhh = 十六進位值
\ooo = 八進位值
\0 = null (是null字元,python不像C用null字元來判斷字串結束)
s = 'a\nb\tc'
print(s)
結果:
a
b c
|
轉換資料型態函數 |
轉換資料型態函數:
int():轉成整數
float():轉成浮點數
str():轉成文字
|
範例3-1:計算三位同學的平均分數 |
輸入函數:a1 = input(訊息)
範例3-1:計算三位同學的平均分數
a1 = input('輸入第一位同學成績=?')
a2 = input('輸入第二位同學成績=?')
a3 = input('輸入第三位同學成績=?')
avg = (int(a1)+int(a2)+int(a3))/3
print('平均分數=%5.2f'% (avg))
|
python的文字連接串接字元+ |
python的文字連接串接字元:+
vb.net的文字連接串接字元:&
c#,javascript的文字連接串接字元:+
php的文字連接串接字元:.
|
1.整數 |
1.整數:
A.特色:資料範圍沒有限制,可以任意大的數字
B.次方:5**4 = 5*5*5*5
C.轉換成整數的函數:int(3.14) = 3
D.二進位表示 = int('100',2) = 4
有一個二進位數 = 100,若把它轉成整數 = 4
|
2.浮點數 |
2.浮點數
A.特色:有小數點的數
B.轉換成浮點數的函數:float('3.14') = 3.14
|
3.字串 |
3.字串 = 'abc'
A.轉換成字串的函數:str(3.14) = '3.14'
|
| 4.布林值 |
4.布林值
A.特色:兩種數值:True,False
B.例如:等於False的各種寫法
False = 0 = 0.0 = None
= () 空tuple
= [] 空串列
= {} 空字典
= '' 空字串
C.轉換成bool布林的函數:bool(1) = True
bool(0) = False
bool(()) = False
|
4.變數的資料型態:type(變數) |
顯示變數的資料型態:type(變數)
type(20) = <class int>
type('abc') = <class str>
type(3.14) = <class float>
type(True) = <class bool>
a = 20
print(a, type(a))
b = 'abc'
print(b, type(b))
c = 3.14
print(c, type(c))
d = True
print(d, type(d))
|
5.印出變數的資料型態:type(變數) |
type(20) = <class int>
type('abc') = <class str>
type(3.14) = <class float>
type(True) = <class bool>
|
範例3-1: |
a = 20
print(a, type(a))
b = 'abc'
print(b, type(b))
c = 3.14
print(c, type(c))
d = True
print(d, type(d))
|
6.變數: |
6.變數:
A.觀念1:傳統的c,c++,java屬於『靜態語言』,變數使用前必須要先宣告。而且一旦宣告後,就不能更改資料型態了。
B.觀念2:python屬於『動態語言』,變數使用前不須要先宣告。而且一旦宣告後,還能夠隨時更改變數的資料型態(=右邊直接更改)。
|
範例3-2: |
a = 20
print(a, id(a))
a = 'abc'
print(a, id(a))
補充:id(變數)可以顯示該筆數的記憶體編號
C.變數的命名:
☎變數的開頭,不可以說數字
☎變數的開頭,可以是『英文字母,unicode字元,底線_』
☎變數可以說『中文』
☎大小寫字母的變數,視為不同(A,a)
☎特定英文(函數名稱)不可以當作變數,例如:if,else,for...
☎正確範例:socore_1,成績
☎錯誤範例:1_socore,成績?
|
7.算術運算子 |
7.算術運算子
加,a=5+3
減,a=5-3
乘,a=5*3
浮點除法,a=5/3
整數除法,a=5//3(相除的整數商 //)
相除後求餘數,a=5%3
次方,a=5**3
先乘除,後加減,例如:a=(5+3*2)
|
8.變數遞增,遞減(再加上,再減去) |
8.變數遞增,遞減(再加上,再減去)
再加,a=a+3,a+=3
再減,a=a-3,a-=3
再乘,a=a*3,a*=3
再浮點除法,a=a/3,a/=3
再整數除法,a=a//3,a//=3
再相除後求餘數,a=a%3,a%=3
再次方,a=a**3,a**=3
|
9.比較運算子 |
9.比較運算子
>,>=,<,<=
判斷是否等於:if(a==b)
判斷是否不等於:if(a!=b)
|
10.邏輯運算子 |
10.邏輯運算子
以及:if(x>3 and x<6)
或:if(x>3 or x<6)
非:if(not(x>3))
|
11.in與is運算子 |
11.in與is運算子
(1).x in y:判斷x是否為y的其中一個元素
(2).x is y:判斷x是否與y變數的id編號是否相同(是否為同一個物件)
|
範例3-3: |
x = 1
y = [1,2,3]
print(x in y)
x = 4
y = [1,2,3]
print(x not in y)
x = 4
y = '4'
print(x is y)
x = 4
y = '4'
print(x is not y)
注意鑑別:
x not in y
x is not y
|
| |
| |
| chp4. python資料的儲存容器Containers |
| python資料的四種儲存容器Containers |
範例4-0:四種容器 |
6.tuple:範例4-1 |
範例4-2:顯示二維tuple:用enumerate(a) |
範例4-3:串列(list):類似傳統的陣列 |
| 範例4-4:顯示二維串列:用enumerate(a)來讀取資料 |
範例4-5:查詢元素是否在串列list內 |
8.範例4-6:字典(dict):類似傳統的結構struct物件,類別物件 |
9.範例4-7:集合(set):以{..}儲存的變數 |
範例4-8:製作英翻中字典 |
| 範例4-9:顯示對聯文字集合 |
範例4-10:比較兩段詩詞的共同字 |
範例4-11:查詢數學及格名單 |
範例4-12:輸入名單,提供查詢 |
|
|
python資料的四種儲存容器Containers |
python資料的四種儲存容器Containers:
1.python資料的儲存容器有四種:序對tuple元組,串列(list),字典(dict),集合(set)
一.功用,用途:
(1).串列(list):list串列,就類似Array陣列,a=[1,2,3]
(2).集合(set):可以用來做數學的『交集,聯集』計算,a={1,2,3,4}
(3).字典(dict):可以透過『文字』來存取資料(不需要用編號),a={'b1':'john','b2':'tom','b3':'jane'}
(4).序對tuple元組:
_A).tuple類似list串列(差異就是tuple={..},list=[...])。
_B).tuple可以是『字典(dict),或集合(set),或串列(List)』的元素。但是list串列無法成為別人的元素。
python資料的儲存容器特色:
python資料的儲存容器有四種:序對tuple,串列(list),字典(dict),集合(set)
(1).tuple特色:依序存儲資料,可以依照順序取出資料,但不能夠更改,是不可變的物件。
(2).串列(list)特色:可依序存儲資料,可以依照順序取出資料,也能夠更改。
(3).字典(dict)特色:儲存的資料為『鍵vs值』(key vs value)對應的資料。
(4).集合(set)特色:可儲存沒有次序性的資料。(若要搜尋某資料是否存在,而不根據鍵vs值的方式搜尋,就可以用集合set。
|
6.四種容器:範例4-0 |
#範例4-0:四種容器
#(1).串列(list):list串列,就類似Array陣列,a=[1,2,3]
a = [1,2,3]
print('list=',a)
print('list[0]=',a[0])
#(2).集合(set):可以用來做數學的『交集,聯集』計算,a={1,2,3,4}
b = {1,2,3,4}
c = {3,4,5}
print('b & c=',b & c)
print('b or c=', b | c)
#(3).字典(dict):可以透過『文字』來存取資料(不需要用編號),a={'b1':'john','b2':'tom','b3':'jane'}
a={'b1':'john','b2':'tom','b3':'jane'}
print(a['b1'])
#(4).tuple類似list串列,a = ('tom','mike','peter')
a = (1,2,3)
print('a[0]=', a[0])
成果圖片: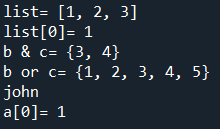
程式碼內容
|
6.tuple:範例4-1 |
#範例4-1:tuple:
#(1).建立方法1:
a = 'tom','mike','peter'
#建立方法2:
a = ('tom','mike','peter')
#(2).取出其中元素:a[0]
a = ('tom','mike','peter')
print(a[0])
#(3).將tuple指定給多個變數:a,b,c = tuple
a,b,c = ('tom','mike','peter')
print(a)
#(4).將兩個tuple變數交換:a,b = b,a
a=('tom','mike')
b=(1,2,3)
print('交換前,a=',a,'b=',b)
a,b = b,a
print('交換後,a=',a,'b=',b)
print(a)
#(5).轉換tuple函數:tuple(串列)
a=('tom','mike','peter')
b=tuple(a)
print(b)
#(6).計算tuple長度函數:len(tuple)
a=('tom','mike','peter')
b=len(a)
print(b)
#(7).只有一個tuple元素,必須加上,:('tom',)
a=('tom',)
print(a)
#(8).把tuple元素排序sorted(a),反向排reversed(a)
a=('tom','mike','peter','yellow')
print('原始值=',a)
b = [i for i in reversed(a)]
print('反向=',b)
c = [i for i in sorted(a)]
print('排序=',c)
d = [i for i in reversed(sorted(a))]
print('反向排序=',d)
#或是,反向排序
print(sorted(a, reverse=True))
成果圖片: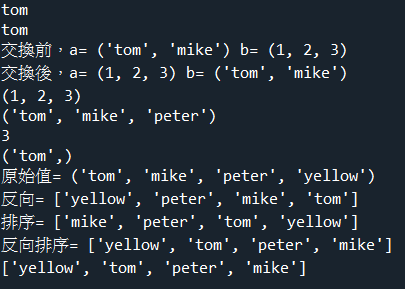
程式碼內容
|
範例4-2:如何顯示二維tuple:用enumerate(a)來讀取資料 |
(9).範例4-2:如何顯示二維tuple:用enumerate(a)來讀取資料
☎enumerate(a)是列舉函數(編號i,元素x)
☎顯示一維串列:print((x for i,x in enumerate(a)))
☎顯示二維串列:print((x[0]+'姓名是'+x[1] for i,x in enumerate(a)))
☎範例4-2:顯示一維,二維tuple:
##顯示第一維tuple元素
#印出格式:i,nmae
a = ('tom','jane','mary')
print(a)
print([k for k,v in enumerate(a)])
print([v for k,v in enumerate(a)])
print([str(i)+'='+ x for i,x in enumerate(a)])
#顯示第二維tuple元素
a = (('tom','湯姆'),('mike','麥克'),('peter','彼德'))
print([x[0]+'姓名是'+x[1] for i,x in enumerate(a)])
成果圖片:
程式碼內容
|
範例4-3:串列(list):類似傳統的陣列 |
7.#範例4-3:串列(list):類似傳統的陣列
#(1).建立方法:
a = ['tom','mike','peter']
#(2).取出其中元素:a[0]
a = ['tom','mike','peter']
print('(2)', a[0])
#(3).計算串列(list)長度函數:len(tuple)
a=['tom','mike','peter']
b=len(a)
print('(3)',b)
#(4).修改串列(list)的某個元素:a[1] = '新值'
a=['tom','mike','peter']
a[1] = 'jane'
print('(4)',a)
#(5).顯示串列(list)的某個元素的編號index:a.index(元素)
a=['tom','mike','peter']
b = a.index('peter')
print('(5)',b)
#(6).新增一個元素到串列(list)的最後:a.append(元素)
a=['tom','mike','peter']
a.append('marry')
print('(6)',a)
#錯誤寫法:
b = a.append('marry')
print(b)
#(7).新增一個元素到串列(list)的某個位置:a.insert(位置,元素)
a=['tom','mike','peter']
a.insert(1,'marry')
print('(7)',a)
#(8).刪除第幾個元素:del a[編號]
a=['tom','mike','peter']
del a[1]
print('(8)',a)
#(9).刪除第幾個元素:a.pop(編號)
a=['tom','mike','peter']
a.pop(1)
print('(9)',a)
a.pop() #若是沒有指定編號,則刪除最後一個
print(a)
#(10).讀取串列裡面的每個元素:for 元素 in 串列
a=['tom','mike','peter']
for 元素 in a:
print(元素)
#(11).排序:a.sort()
a=['tom','mike','peter']
a.sort()
print('(11)',a)
#(11).把串列元素排序sorted(a),反向排reversed(a)
a=['tom','mike','peter','yellow']
print('(11)','原始值=',a)
b = [i for i in reversed(a)]
print('反向=',b)
c = [i for i in sorted(a)]
print('排序=',c)
d = [i for i in reversed(sorted(a))]
print('反向排序=',d)
#(12).串列可以包含各種型態的資料
a=['a001','mike',90,85,65.5]
print('(12)',a)
#(13).連接兩個串列:+
a=['tom','mike','peter']
b=['張三','李四','王五']
print('(13)',a+b)
#(14).把字串或tuple轉換成list串列函數:list()
a='tom'
print('(14)',list(a))
#(15).將字串分割成串列(傳統的陣列):字串.split('分隔字')
a='張三,李四,王五,趙六'
list_a = a.split(',')
print('(15)',list_a)
#(16).取出串列list的部分元素:a[開始:結束:間隔]
a=list('abcdefg')
print('(16)',a)
print(a[:]) #印出串列的每一個元素
print(a[1:]) #印出編號1位置後的每一個元素
print(a[:3]) #印出元素,直到編號3的前一個位置
print(a[2:5]) #印出編號2元素,直到編號5的前一個位置
print(a[0:7:2]) #印出編號0元素,直到編號7的前一個位置,間隔2
print(a[::-1]) #反轉字串,顛倒字串
#(17).拷貝複製串列,有三種方法:copy,[:],=
#A.特色:listb=lista,這兩個串列指向同一個記憶體物件,若修改其中一個元素,另外一個也會跟著修改
#B.特色:listb=lista.copy()
#或是 listb=lista[:]
#這兩個串列是不同的記憶體物件,若修改其中一個元素,另外一個不會受到影響
a=['tom','mike','peter']
b = a.copy()
b[0] = 'bbb'
print('(17)',a)
print(b)
#################
c = a[:]
c[0] = 'ccc'
print(a)
print(c)
#################
d = a
d[0] = 'ddd'
print(a)
print(d)
成果圖片: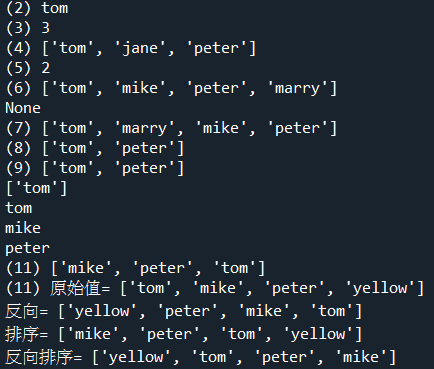
成果圖片: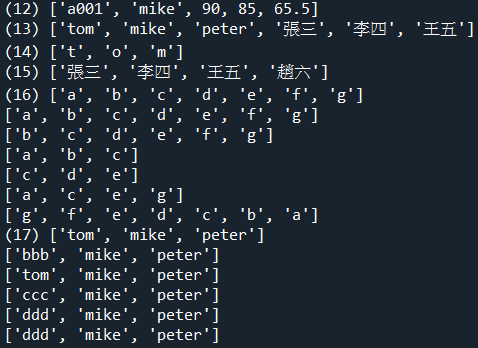
程式碼內容
|
範例4-4:顯示二維串列:用enumerate(a)來讀取資料 |
#範例4-4:顯示一維,二維串列
#範例4-4:如何顯示二維串列:用enumerate(a)來讀取資料
#顯示第一維串列元素
#印出格式:i,nmae
a = ['tom','jane','mary']
print([x for i,x in enumerate(a)])
print([str(i)+'='+ x for i,x in enumerate(a)])
#顯示第二維串列元素
a = [['tom','湯姆'],['mike','麥克'],['peter','彼德']]
print([x[0]+'姓名是'+x[1] for i,x in enumerate(a)])
成果圖片:
程式碼內容
|
範例4-5:查詢元素是否在串列list內 |
#範例4-5:查詢元素是否在串列list內:
#☎方法1:一般一維串列:if txt in a
a=['tom','mike','peter','yellow']
def find_tuple(txt,a):
if txt in a:
return txt + '存在list內'
else:
return txt + '不存在list內'
s = input('請輸入查詢姓名?')
res = find_tuple(s,a)
print(res)
#☎方法2:一般一維串列:a.index(txt)
#[1,2,3].index(2) # => 1
#[1,2,3].index(4) # => ValueError
a=['tom','mike','peter','yellow']
s = input('請輸入查詢姓名?')
try:
res = a.index(s)
print(s+'找到了,在編號為'+str(res)+'的位置')
except ValueError:
print(s+'找不到')
#☎方法3:一般一維串列:[x+'找到了' for i,x in enumerate(a) if s==x]
a=['tom','mike','peter','yellow']
s = input('請輸入查詢姓名?')
#查詢方法1:
print([x+'找到了' for i,x in enumerate(a) if s==x])
#☎方法4:一般一維串列:for i,x in enumerate(a) if s==x
a=['tom','mike','peter','yellow']
s = input('請輸入查詢姓名?')
#查詢元素方法:
b = ['姓名為'+x for i,x in enumerate(a) if s==x]
if b==[]:
print('找不到')
else:
print(b)
成果圖片: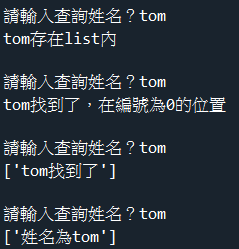
程式碼內容
|
8.範例4-6:字典(dict):類似傳統的結構struct物件,類別物件 |
#範例4-6:字典(dict):類似傳統的結構struct物件,類別物件
#(1).建立方法:
a = {'tom':'湯姆','mike':'麥克','peter':'彼德'}
print('(1)',a['tom'])
print(a['mike'])
#(2).取出字典dict的某個元素,若不存在,用get()顯示錯誤訊息:
a = {'tom':'湯姆','mike':'麥克','peter':'彼德'}
print('(2)',a.get('jane'))
print(a.get('jane','找不到這個人'))
#(3).新增/修改字典dict的一個元素:a['鍵'] = '值'
a = {'tom':'湯姆','mike':'麥克','peter':'彼德'}
a['jane'] = '珍妮'
print('(3)',a)
a['peter'] = '彼得'
print(a)
print(a.get('jane','找不到這個人'))
#(4).刪除字典dict的一個元素:del a['鍵']
a = {'tom':'湯姆','mike':'麥克','peter':'彼德'}
del a['tom']
print('(4)',a)
#(5).刪除字典dict的所有元素:a.clear()
a = {'tom':'湯姆','mike':'麥克','peter':'彼德'}
a.clear()
print('(5)',a)
#(6).把串列轉換成字典dict格式:a.clear()
a = [['tom','湯姆'],['mike','麥克'],['peter','彼德']]
b = dict(a)
print('(6)',b)
a = (['tom','湯姆'],['mike','麥克'],['peter','彼德'])
b = dict(a)
print(b)
#(7).合併兩個字典dict格式:a.update(b)
a = {'tom':'湯姆','mike':'麥克','peter':'彼德'}
b = {'marry':'瑪麗','brown':'布朗'}
a.update(b)
print('(7)',a)
#(8).拷貝複製字典dict,有兩種方法:copy,=
#A.特色:dict_2=dict_1,這兩個字典指向同一個記憶體物件,若修改其中一個元素,另外一個也會跟著修改
#B.特色:dict_2=dict_1.copy()
#這兩個字典是不同的記憶體物件,若修改其中一個元素,另外一個不會受到影響
a = {'tom':'湯姆','mike':'麥克','peter':'彼德'}
b = a.copy()
b['tom'] = '唐木'
print('(8)',a)
print(b)
#################
d = a
d['mike'] = '脈課'
print(a)
print(d)
#(9).讀取字典dict的鍵,值:for 鍵,值 in 字典
a = {'tom':'湯姆','mike':'麥克','peter':'彼德'}
#(A).讀取字典的所有值
for value in a.values():
print('(9)',value)
#(B).讀取字典的所有鍵
for key in a.keys():
print(key)
#(C).讀取字典的所有鍵+值
for key,value in a.items():
print(key,',',value)
#(10).把字典元素排序sorted(a),反向排reversed(a)
a = {'tom':'湯姆','mike':'麥克','peter':'彼德'}
print('(10)','原始值=',a)
b = {k:v for k,v in sorted(a.items())}
print('排序=',b)
#(11).如何使用enumerate列舉方法來顯示字典dict
#方法:for i, (k, v) in enumerate(mydict.items())
#☎注意:enumerate(mydict.items())裡面的字典,必須要寫items(),不可以只有寫dict
#範例:
a = {'tom':'湯姆','mike':'麥克','peter':'彼德'}
#顯示第一維tuple元素
print('(11)',[x+'的姓名為'+y for i,(x,y) in enumerate(a.items())])
成果圖片: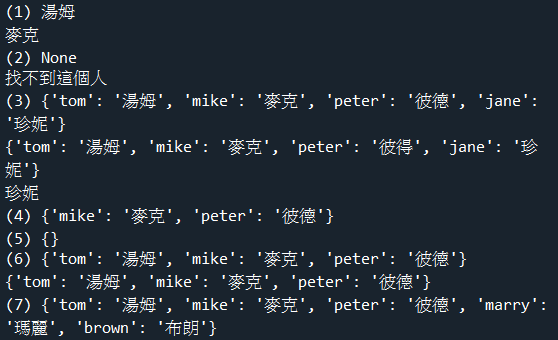
成果圖片:
程式碼內容
|
9.範例4-7:集合(set):以{..}儲存的變數 |
9.範例4-7:集合(set):以{..}儲存的變數
#(1).建立方法:兩種方法
#方法一:a = {1,2,3,4}
#方法二:b = set((1,2,'a','b'))
a = {1,2,3,4}
print('(1)',a)
b = set((1,2,'a','b'))
print(b)
c = set('today')
print(c)
#(2).空集合
#☎注意:空集合必須用a=set()
#不可以用a={}
#例如:
a=set()
#(3).新增一筆資料:a.add(元素)
a = set((1,2,'a','b'))
a.add('tom')
print('(3)',a)
#(4).刪除一筆資料:a.remove(元素)
a = set((1,2,'a','b'))
a.remove('b')
print('(4)',a)
#(5).把串列元素排序sorted(a),反向排reversed(a)
#☎注意:都無效:sorted(a),reversed(a)
a={'tom','mike','peter','yellow'}
print('(5).原始值=',a)
#b = {i for i in reversed(a)}
#print('反向=',b)
c = {i for i in sorted(a)}
print('排序=',c)
d = {i for i in reversed(sorted(a))}
print('反向排序=',d)
#(6).集合的運算:交集(&),聯集(|),差集(-),互斥(^)
a = set('tiger')
b = set('bear')
print('(6)',a|b) #聯集(|)
print(a&b) #交集(&)
print(a-b) #差集(-):元素存在a,但是不存在b
print(a^b) #互斥(^):元素存在a但是不存在b,或元素存在b但是不存在a
print(a)
#(7).二維集合
#A.錯誤的二維集合寫法
#stu = {{'tom',190},{'mike',170},{'jane',200},{'peter',185}}
#B.二維集合寫法
stu = {('tom',190),('mike',170),('jane',200),('peter',185)}
#或是
stu = [('tom',190),('mike',170),('jane',200),('peter',185)]
#C.如何把二維串列,轉換成二維集合
#方法
#(i).先把內部的串列list用map()轉成tuple
#(ii).然後用set()再轉換成集合
#(ii).外面用list()轉換
#範例:
t=[[1, 7], [3, 7], [1, 7], [5, 8], [3, 7]]
t = list(set(map(tuple,t)))
print('(7)',t)
#結果:[(3, 7), (5, 8), (1, 7)]
#集合set裡面重複的,會自動刪除
#>>> t=[[1, 7], [3, 7], [1, 7], [5, 8], [3, 7]]
#>>> t = list(set(map(tuple,t)))
#>>> t
#[(3, 7), (5, 8), (1, 7)]
成果圖片: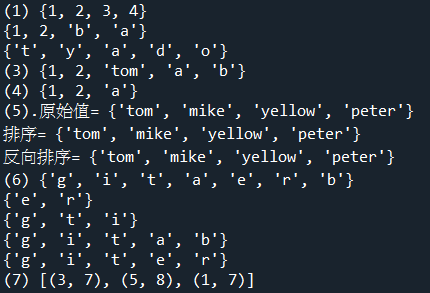
程式碼內容
|
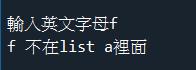
範例4-8:製作英翻中字典(貓狗魚豬),若是沒有該字顯示找不到 |
#範例4-8:製作英翻中字典(貓狗魚豬),若是沒有該字顯示找不到
#☎注意:若是要對應關係,就要用字典dict
a = {'cat':'貓','dog':'狗','fish':'魚','pig':'豬'}
print(a)
print(a.keys())
b = input('請輸入查詢的英文?')
print(a.get(b,'找不到這個字'))
成果圖片:
程式碼內容
|
範例4-9:顯示一個對聯的文字集合(刪除標點符號) |
#範例4-9:顯示一個對聯的文字集合(刪除標點符號)
a=" 天增歲月人增壽,春滿乾坤福滿門。 "
a.strip()
b = set(a)
b.remove(',')
b.remove('。')
b.remove(' ')
print(b)
成果圖片:
程式碼內容
|
範例4-10:顯比較兩段詩詞的共同字有哪些 |
(8).範例4-10:顯比較兩段詩詞的共同字有哪些?
#☎注意:若是要做集合的交集聯集差集,就必須把串列list或tuple轉成set
a="君問歸期未有期,巴山夜雨漲秋池。何當共翦西窗燭,卻話巴山夜雨時。"
b="雲想衣裳花想容,春風拂檻露華濃。若非群玉山頭見,會向瑤台月下逢。"
a = set(a)
a.remove(',')
a.remove('。')
b = set(b)
b.remove(',')
b.remove('。')
print(a&b) #使用交集,顯示交集的集合set
成果圖片:
程式碼內容
|
範例4-11:已知全班同學中數學及格名單,英文及格名單 |
(9).範例4-11:已知全班同學中數學及格名單,英文及格名單。
全班同學:張三,李四,王五,趙六,林七,陳八,孫九
數學及格:張三,李四,林七,陳八
英文及格:張三,李四,王五,陳八,孫九
請計算A.數學不及格名單,B.英文不及格名單,
C.英文與數學同時及格名單。
D.英文及格,但是數學不及格名單。
#☎注意:若是要做集合的交集聯集差集,就必須把串列list或tuple轉成set
#☎注意:set裡面的元素,一般都是用tuple(),或是list[]
全班同學 = set(('張三','李四','王五','趙六','林七','陳八','孫九'))
數學及格 = set(('張三','李四','林七','陳八'))
英文及格 = set(('張三','李四','王五','陳八','孫九'))
print('數學不及格=',全班同學-數學及格)
print('英文不及格=',全班同學-英文及格)
print('數學英文都及格=',數學及格 & 英文及格)
print('英文及格,但是數學不及格=',英文及格 - 數學及格)
成果圖片:
程式碼內容
|
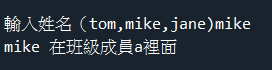
範例4-12:輸入三位班上同學姓名,email,然後提供查詢 |
(10).範例4-12:輸入三位班上同學姓名,email,然後提供查詢
#☎注意:若是要對應關係,就要用字典dict
#☎注意:若是要搜尋資料表,就可以用字典dict
#☎注意:字典dict的新增元素方法: stu[a1] = b1
#☎注意:字典dict的查詢元素方法: stu.get(a1,'找不到')
stu = dict() # 空的字典
# 輸入三個新的同學資料
a1 = input('輸入同學姓名?')
b1 = input('輸入同學email?')
stu[a1] = b1
a1 = input('輸入同學姓名?')
b1 = input('輸入同學email?')
stu[a1] = b1
a1 = input('輸入同學姓名?')
b1 = input('輸入同學ema+il?')
stu[a1] = b1
print(stu)
# 查詢
a1 = input('輸入你要查詢的同學姓名?')
result = stu.get(a1,'找不到這個學生')
print(result)
成果圖片: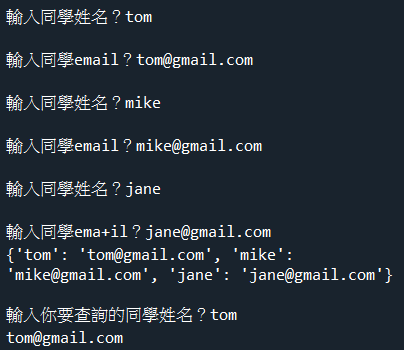
程式碼內容
|
| |
| |
| chp6.迴圈結構for,while |
| 目錄 |
1.迴圈for loop有四種 |
範例6-1:印出10行恭喜發財 |
範例6-2:印出99乘法表 |
(2).簡化寫法:只寫終止值 |
| (3).三種控制迴圈的指令 |
範例6-3:99乘法表到i=5就停止 |
範例6-4:99乘法表到i=5就跳過 |
範例6-5:使用for讀取tuple的所有元素 |
|
| 範例6-6:使用for讀取串列list的所有元素 |
範例6-7:使用for讀取字典dict的所有元素 |
範例6-8:用for產生串列list |
範例6-9:製作99乘法表串列 |
範例6-10:用for產生集合set |
| 範例6-11:把英文字都存入集合內 |
範例6-12:用for產生字典dict |
範例6-13:把英字母都存入字典內 |
(10).while迴圈 |
範例6-14:,計算1到10的總和 |
| 範例6-15:輸入n,計算1到n的平方合 |
範例6-16:列出1到1000,不被2也不被3整除數字 |
範例6-17:or-enumerate列舉迴圈 |
範例6-18:應用到for迴圈,會自動顯示編號 |
範例6-19:丟骰子,丟出6遊戲結束 |
| 範例6-20:猜數字,猜1~99的數 |
|
|
|
|
迴圈for loop有四種 |
for loop有四種:
(1)第一種:index迴圈
for i in range(1,10)
(2)第二種:讀取container容器的迴圈
for i in a
注意:a可以是四種container容器,或是文字string字串
(3)第三種:讀取container容器的迴圈,並給予編號
for k,v in enumerate(a)
(4)第四種:讀取dict容器迴圈的k,v
for k,v in a.items()
for k in a.keys()
for v in a.values()
|
1.for迴圈 |
1.for迴圈
(1).公式:
for 變數 in range(起始值,終止值,遞增減值):
要重複做的程式
#☎注意1:range的範圍為終止值的前一個值
#☎例如:range(1,10),表示:1,2,3,4,5,6,7,8,9
|
範例6-1:印出10行恭喜發財 |
範例6-1:印出10行恭喜發財
for i in range(1,11,1):
print(i,'恭喜發財')
成果圖片: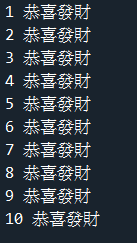
程式碼內容
|
範例6-2:印出99乘法表 |
範例6-2:印出99乘法表
for i in range(1,10,1):
for j in range(1,10,1):
print(i,'x',j,'=',i*j)
成果圖片: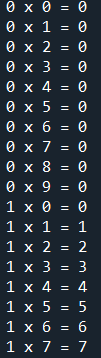
程式碼內容
|
(2).簡化寫法:只寫終止值(若是起始值=1,遞增1) |
(2).簡化寫法:只寫終止值(若是起始值=1,遞增1)
for i in range(10):
for j in range(10):
print(i,'x',j,'=',i*j)
|
(3).三種控制迴圈的指令 |
(3).三種控制迴圈的指令
A.中斷迴圈(break),
B.直接到下一輪迴圈(continue),
C.若正常完成全部迴圈會執行else
|
範例6-3:99乘法表i*j,印到i=5就停止 |
範例6-3:99乘法表i*j,印到i=5就停止
for i in range(1,10):
if i==5:
break
for j in range(1,10):
print(i,'x',j,'=',i*j)
成果圖片: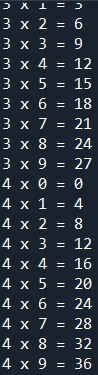
程式碼內容
|
範例6-4:99乘法表i*j,到i=5就跳過 |
範例6-4:99乘法表i*j,到i=5就跳過,直接顯示下一輪
for i in range(1,10):
if i==5:
continue
for j in range(1,10):
print(i,'x',j,'=',i*j)
成果圖片: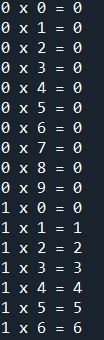
成果圖片: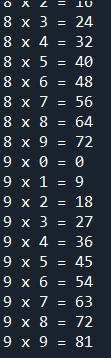
程式碼內容
|
(4).範例6-5:使用for讀取tuple的所有元素 |
(4).範例6-5:使用for讀取tuple的所有元素
#☎注意:for s in a(s不是編號,而是元素)
a = ('tom','mike','peter')
#方法1:沒有編號,直接印出元素
for s in a:
print(s)
#方法2:印出(編號,元素),編號由0開始
for i in range(0,len(a)):
print(i,a[i])
#方法3:印出(編號,元素),編號由1開始
for i,item in enumerate(a,start=1):
print(i,item)
成果圖片: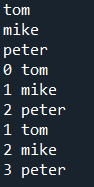
程式碼內容
|
(5).範例6-6:使用for讀取串列list的所有元素 |
(5).範例6-6:使用for讀取串列list的所有元素
#☎注意:for s in a(s不是編號,而是元素)
a = ['tom','mike','peter']
#方法1:沒有編號,直接印出元素
for s in a:
print(s)
#方法2:印出(編號,元素),編號由0開始
for i in range(0,len(a)):
print(i,a[i])
#方法3:印出(編號,元素),編號由1開始
for i,item in enumeratea,start=1):
print(i,item)
成果圖片: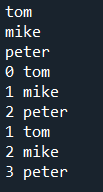
程式碼內容
|
(6).範例6-7:使用for讀取字典dict的所有元素 |
(6).範例6-7:使用for讀取字典dict的所有元素
a = {'tom':'湯姆','mike':'麥克','peter':'彼德'}
#方法1:只印出鍵keys
for i in a.keys():
print(i)
#方法2:只印出值values
for v in a.values():
print(v)
#方法3:印出鍵keys,值values
for i,v in a.items():
print(i,v)
成果圖片:
程式碼內容
|
(7).範例6-8:用for產生串列list |
(7).範例6-8:用for產生串列list
A.特色:生成式(comprehension)可以依照規則產生資料,然後把資料儲存在『串列,字典,集合』內
B.方法1:傳統for迴圈內用append新增值
#☎注意:串列的新增元素,必須用a.append(元素)
#☎注意:不可以用a[編號] = 值來新增
#新增元素到串列list方法一:[.....](a.append('tom'))
a=[]
for i in range(0,6):
a.append(i**2)
print(a)
C.方法2:在[]內用for迴圈來新增值
公式:[運算式 for 元素 in 可迭代物件]
#新增元素到串列list方法二:[i*2 for in in range(11)]
a = [i**2 for i in range(1,6)]
print(a)
D.方法3:在[]內用for迴圈來新增值,再加上if判斷
公式:[運算式 for 元素 in 可迭代物件 if 判斷式]
#把1~100的偶數新增到list串列裡面
a = [i for i in range(1,11) if i%2==0]
print(a)
成果圖片: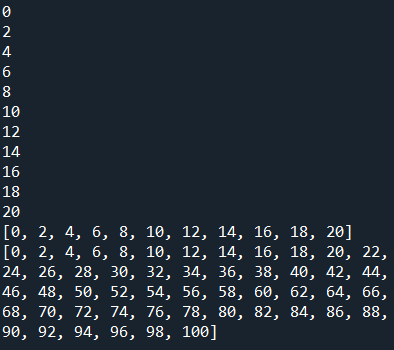
程式碼內容
|
範例6-9:製作99乘法表串列 |
範例6-9:製作99乘法表串列,但是每個元素都是一個tuple,
例如(2,3)
☎注意:tuple可以是『字典(dict),或集合(set),或串列(List)』的元素。但是list串列無法成為別人的元素。
a = [(i,j) for i in range(1,10) for j in range(1,10)]
print(a)
成果圖片:
程式碼內容
|
(8).範例6-10:用for產生集合set |
(8).範例6-10:用for產生集合set
A.方法1:傳統for迴圈內用add新增值
#☎注意:集合set的新增元素,必須用a.add(元素)
#☎注意:不可以用a[編號] = 值來新增
#☎注意:空集合必須用a=set()(不可以用a={})
#新增元素到集合set方法一:a.add(值),印出1~10的元素
a = set()
for i in range(1,11):
a.add(i)
print(a)
B.方法2:用{}內for迴圈生成新增值
公式:{運算式 for 元素 in 可迭代物件}
#新增元素到集合set方法二:印出偶數,a={i for i in range(1,11)}
b = {i for i in range(1,11) if i%2==0}
print(b)
成果圖片: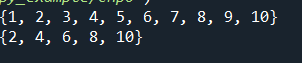
程式碼內容
|
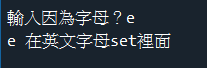
範例6-11:把英文字都存入集合內 |
範例6-11:把英文字都存入集合內
#☎注意:for迴圈的s in str,可以讀取字串的每一個字
#☎注意:集合遇到重複值會自動刪除
#把英文字都存入集合內:方法1:a=set('tomorrow')
str = 'tomorrow afternoon'
a = set(str)
print(a)
#把英文字都存入集合內:方法2:a={s for s in 'tomorrow'}
b = {s for s in str}
print(b)
#把英文字都存入集合內:方法3:刪除集合裡面的某個元素
c = set(str)
c.remove(' ')
print(c)
print(a)
成果圖片:
程式碼內容
|
範例6-12:用for產生字典dict |
範例6-12:用for產生字典dict
A.方法1:傳統for迴圈內用(a[鍵]=值)新增值
#☎注意:空集合必須用a=dict()
a=dict()
for i in range(0,6):
a['num'+str(i)] = i**2
print(a)
B.方法2:用{}內for迴圈生成新增值
公式:{鍵:值 for 元素 in 可迭代物件}
a = {'num'+str(i):i**2 for i in range(0,6)}
print(a)
成果圖片:
程式碼內容
|
範例6-13:把英字母都存入字典內,並對應其出現的次數 |
範例6-13:把英字母都存入字典內,並對應其出現的次數
#☎注意:str.count('t')乃是尋找字串str裡面t出現的次數
str = 'tomorrow'
#方法1:for s in str....(a[鍵] = 值)
a = dict()
for s in str:
a[s] = str.count(s)
print(a)
#方法2:{鍵:值 for s in ttr}}
#b = dict()
b = {s:str.count(s) for s in str}
print(b)
成果圖片:
程式碼內容
|
(10).while迴圈 |
(10).while迴圈
A.公式:
i=起始值
while i<終止值:
運算程式
i=i+1(或是i=i-1)
#☎注意:在python的i=i+1不能夠寫成i++
|
範例6-14:計算1到10的總和 |
範例6-14:計算1到10的總和
i=1
sum = 0
while i<11:
sum += i
i = i+1
print(sum)
#☎注意:在python的i=i+1不能夠寫成i++
成果圖片:
程式碼內容
|
範例6-15:輸入n,計算1到n的平方合 |
範例6-15:輸入n,計算1到n的平方合(1**2+2**2+3**2+...n**2)
n = int(input('輸入n = '))
sum = 0
for i in range(1,n+1):
sum += i**2
print(sum)
成果圖片:
程式碼內容
|
範例6-16:列出1到100,不被2也不被3整除數字 |
範例6-16:列出1到100,不被2也不被3整除的數字
for i in range(1,101):
if((i%2)!=0 and (i%3)!=0):
print(i)
成果圖片: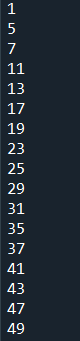
成果圖片: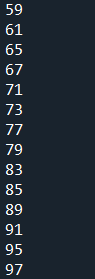
程式碼內容
|
範例6-17:for-enumerate列舉迴圈 |
(11).for-enumerate列舉迴圈
(A).功能:可以把iterable可以迭代的資料型態,都加上編號,變成很多內tuple元素的串列
#enumerate(串列),enumerate可以把串列,自動加上編號
例如:
seasons = ['Spring', 'Summer', 'Fall', 'Winter']
a=list(enumerate(seasons))
print(a)
結果:[(0, 'Spring'), (1, 'Summer'), (2, 'Fall'), (3, 'Winter')]
a = list(enumerate(seasons, start=1))
print(a)
# 下標從 1 開始
結果:[(1, 'Spring'), (2, 'Summer'), (3, 'Fall'), (4, 'Winter')]
成果圖片:
程式碼內容
|
範例6-18:應用到for迴圈,會自動顯示編號 |
(B).範例6-18:應用到for迴圈,會自動顯示編號
#☎for 若要顯示編號,必須手動計算
i = 0
seq = ['one', 'two', 'three']
for element in seq:
print i, seq[i]
i +=1
#☎for-enumerate 自動顯示編號
#enumerate(串列),enumerate可以把串列,自動加上編號
seq = ['one', 'two', 'three']
for i, element in enumerate(seq):
print i, element
成果圖片: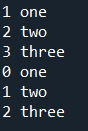
程式碼內容
|
範例6-19:丟骰子,丟出6遊戲結束 |
範例6-19:丟骰子,直到丟出6,才顯示遊戲結束
#☎注意:隨機亂數的函數是random.randint(1,n)
#☎注意:而且使用亂數函數,必須用import random
#☎注意:常用的python亂數函數
(1)取出1~6的亂數:n1 = random.randint(1,6)
(2)取出某串列陣列的第n個亂數元素:n1 = random.choice(串列)
import random
while True:
num = random.randint(1,6)
if num ==6:
print('丟到6,遊戲結束')
break
成果圖片: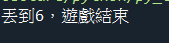
程式碼內容
|
範例6-20:猜數字,猜1~99的數 |
範例6-20:猜數字,猜1~99的數,若是不對,則會提示猜小了,猜大了,猜中了
import random
ans = random.randint(1,99)
print(ans)
gus = 0
while gus != ans:
gus = int(input('請猜一個數字?'))
if gus > ans:
print('猜大了')
elif gus == ans:
print('猜中了')
elif gus < ans:
print('猜小了')
成果圖片:
程式碼內容
|
| |
| |
| chp7.函數,函式def |
| 1.不傳回值的函數 |
範例7-1:計算1+2+3..+n總和 |
2.有傳回值的函數 |
範例7-2:計算四方形面積 |
3.全域變數,區域變數 |
| 4.在函數內使用全域變數 |
5.範例7-3:傳遞參數可以用起始值 |
6.範例7-4:接收多個函數回傳值 |
範例7-5:傳回今天的年月日 |
7.範例7-6:函數傳遞tuple變數 |
| 8.範例7-7:函數傳遞dict變數 |
9.範例7-8:函數同時傳遞各種變數 |
10.範例7-9:傳遞另一個函數變數 |
11.範例7-10:函數只一行可轉成lambda函數 |
12.範例7-11:內部函數,計算圓周長,圓面積 |
| 13.範例7-12:closure閉包函數 |
14.範例7-13:兩種內建排序函數:sort和sorted |
範例7-13:一般排序 |
範例7-14:進階範例:二維串列,依照總分排序 |
範例7-15:根據年紀大小排序 |
| 範例7-15:依照姓名字母排序 |
進階範例7-16::字典dict,依照英文名字排序 |
|
進階範例7-17:字典dict,依照總分排序 |
進階範例7-18::集合set,依照總分排序 |
| 範例7-19:查詢元素是否在tuple |
範例7-20:查詢元素是否在串列list內(1) |
範例7-21:查詢元素是否在list(2)a.index(txt) |
範例7-22:查詢元素是否在list(3)enumerate(a) if s==x |
範例7-23:二維串列的搜尋 |
| 範例7-24:查詢元素是否在字典dict內 |
範例7-25:查詢元素是否在集合set內 |
|
|
|
1.不傳回值的函數: |
1.不傳回值的函數:
(1).公式:
def 函數名稱(參數1,參數2):
函數內容
|
範例7-1:計算1+2+3..+n總和函數 |
範例7-1:呼叫計算1+2+3..+n的總和的函數
#☎注意:計算1~10,但是在range裡面要寫成for i in range(1,11)
def sum(n):
sum = 0
for i in range(1,n+1):
sum += i
print(sum)
sum(10)
成果圖片:
程式碼內容
|
2.有傳回值的函數: |
2.有傳回值的函數:
(1).公式:
def 函數名稱(參數1,參數2):
函數內容
return 變數
|
範例7-2:呼叫計算四方形面積函數 |
範例7-2:呼叫計算四方形面積的函數
def area(a,b):
s = a*b
return s
result = area(25,35)
print(result)
成果圖片:
程式碼內容
|
3.全域變數,區域變數 |
3.全域變數,區域變數
全域變數:在最外層的變數,例如result
區域變數:在函數內層的變數,例如s
|
4.如何使用全域變數:global |
4.在函數內的區域,如何使用全域變數:global
def test():
global var1
var1 = 10
print('inside=',var1)-
var1 = 5
print('before=',var1)
test()
print('after=',var1)
|
5.範例7-3:函數傳遞參數可以用起始值 |
5.範例7-3:函數傳遞參數可以用起始值
def sum(n=10):
sum = 0
for i in range(1,n+1):
sum += i
print(sum)
sum(5)
sum()
成果圖片:
程式碼內容
|
6.範例7-4:如何接收多個函數回傳值 |
6.範例7-4:如何接收多個函數回傳值
範例7-3:已知半徑,要接受傳回的圓周長,圓面積
def circle(r):
a1 = 2 * 3.14 * r
a2 = 3.14 * r * r
return (a1,a2)
r = float(input('輸入半徑='))
b1,b2 = circle(r)
print('圓周長=',b1,',圓面積=', b2)
成果圖片:
程式碼內容
|
範例7-5:函數傳回今天日期『年,月,日』 |
觀念:python取得日期時間函數datetime的兩種寫法:
(1)
import datetime
print(datetime.datetime.now())
(2)
from datetime import datetime
print(datetime.now())
範例7-5:呼叫函數,傳回今天日期的『年,月,日』
from datetime import datetime
def ymd():
now = datetime.now()
y1 = now.year
m1 = now.month
d1 = now.day
return (y1,m1,d1)
y,m,d = ymd()
print('今天是=',y,'年',m,'月',d,'日')
成果圖片:
程式碼內容
|
7.範例7-6:函數如何傳遞tuple變數:使用位置引數
方法1:直接使用tuple參數
|
7.範例7-6:函數如何傳遞tuple變數:使用位置引數(positional arguments):def fun(*var1)
有兩種方法:
(1).方法1:傳遞參數是tuple,直接使用tuple參數即可
範例:
def show(var1):
print('元素數=',len(var1))
for i in var1:
print(i)
show(('tom','mike','peter'))
(2).方法2:使用位置引數(positional arguments):def fun(*var1)
範例:
def show(*var1):
print('元素數=',len(var1))
for i in var1:
print(i)
show('tom','mike','peter')
#使用位置引數def fun(*var1),就可以把'tom','mike','peter',轉變成tuple('tom','mike','peter')
成果圖片: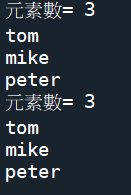
程式碼內容
|
8.範例7-7:函數如何傳遞字典dict變數:使用關鍵字引數
方法1:直接使用dict參數即可
|
8.範例7-7:函數如何傳遞字典dict變數:使用關鍵字引數(keyword arguments):def fun(**var1)
有兩種方法:
(1).方法1:傳遞參數是dict,直接使用dict參數即可
範例:
def show(var1):
for k,v in var1.items():
print(k,'的中文是',v)
show({'tom':'湯姆','mike':'麥克','peter':'彼德'})
(2).方法2:使用關鍵字引數(keyword arguments):def fun(**var1)
範例:
def show(**var1):
for k,v in var1.items():
print(k,'的中文是',v)
show(tom='湯姆',mike='麥克',peter='彼德')
#使用關鍵字引數def fun(**var1),就可以把show(tom='湯姆',mike='麥克',peter='彼德'),轉變成字典show({'tom':'湯姆','mike':'麥克','peter':'彼德'})
#把tom='湯姆',轉變成'tom':'湯姆'
成果圖片: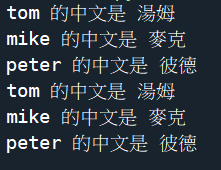
程式碼內容
|
9.範例7-8:函數如何同時傳遞各種變數
方法1:直接使用dict參數即可
|
9.範例7-8:函數如何同時傳遞各種變數:一般變數,tuple變數,字典dict變數:def fun(var1,*var2,**var3)
有兩種方法:
(1).方法1:傳遞參數是dict,直接使用dict參數即可
範例:
def show(var1,var2,var3):
print('var1=',var1)
for i in var2:
print('var2=',i)
for k,v in var3.items():
print('var3=',k,'的中文是',v)
show('marry',(90,85),{'tom':'湯姆','mike':'麥克','peter':'彼德'})
(2).方法2:使用位置引數(positional arguments):def fun(*var1)
範例:
def show(var1,*var2,**var3):
print('var1=',var1)
for i in var2:
print('var2=',i)
for k,v in var3.items():
print('var3=',k,'的中文是',v)
show('marry',90,85,tom='湯姆',mike='麥克')
成果圖片: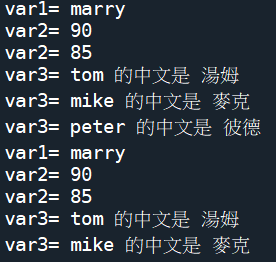
程式碼內容
|
10.範例7-9:函數傳遞另外一個函數變數
範例:傳遞四個函數物件(傳遞加法函數,減法函數...乘除)
|
10.範例7-9:函數傳遞另外一個函數變數(函數可以當作是一個物件)
範例:傳遞四個函數物件(傳遞加法函數,減法函數...乘除)
def plus(a,b):
return a+b
def minus(a,b):
return a-b
def times(a,b):
return a*b
def divided(a,b):
return a/b
def run(fun,x,y):
return fun(x,y)
result = run(plus,6,5)
print('加法=',result)
result = run(minus,6,5)
print('減法=',result)
result = run(times,6,5)
print('乘法=',result)
result = run(divided,6,5)
print('除法=',result)
成果圖片:
程式碼內容
|
11.範例7-10:若函數只有一行,可轉換成lambda函數
範例:傳遞四個函數物件(傳遞加法函數,減法函數...乘除)
|
11.範例7-10:若函數只有一行,可轉換成lambda函數寫法:lambda a,b:a+b
(1).公式:lambda 參數1,參數2:運算式
範例:傳遞四個函數物件(傳遞加法函數,減法函數...乘除)
A.傳統寫法:
def plus(a,b):
return a+b
def run(fun,x,y):
return fun(x,y)
result = run(plus,6,5)
print('加法=',result)
B.精簡lambda寫法:
#lambda就是一個有return的function的簡單寫法
def run(fun,x,y):
return fun(x,y)
result = run(lambda a,b:a+b,6,5)
print('加法=',result)
成果圖片: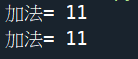
程式碼內容
|
12.範例7-11:內部函數
範例:計算圓周長,圓面積
|
12.範例7-11:內部函數:函數內部有再定義另外一個函數fun1,在函數內部再呼叫fun1
範例:計算圓周長,圓面積
def circle(r):
def cir1(r):
return 2*3.14*r
def cir2(r):
return 3.14*r*r
print('圓周長=',cir1(r))
print('圓面積=',cir2(r))
a = float(input('輸入半徑='))
circle(a)
成果圖片:
程式碼內容
|
13.範例7-12:closure閉包函數 |
13.範例7-12:closure閉包函數:呼叫函數,最後再傳回函數(自製一個函數)
範例:針對不同人,顯示不同的打招呼
def hello(man):
def greeting(msg):
return man+msg
return greeting
x = hello('張三')
y = hello('李四')
#x,y此時不是數值,而是一個函數變數
#例如:x('歡迎光臨')
print(x('歡迎光臨,'))
print(y('恭喜發財,'))
成果圖片: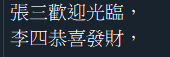
程式碼內容
|
14.範例7-13:兩種內建排序函數:sort和sorted |
14.範例7-13:Python提供兩種內建排序的函數:sort()和sorted()
(1).公式:
sort是容器的函數:sort(cmp=None, key=None, reverse=False)
sorted是python的內建函數:sorted(iterable, cmp=None, key=None, reverse=False)
■iterable:可疊代對象。
■cmp:比較的函數,這個具有兩個參數,參數的值都是從可疊代對象中取出,
此函數必須遵守的規則為,大於則返回1,小於則返回-1,等於則返回0。
■key:主要是用來進行比較的元素,只有一個參數,具體的函數的參數就是取自於可疊代對象中,指定可疊代對象中的一個元素來進行排序。
■reverse:排序規則,reverse = True 降序 , reverse = False 升序(默認)。
(2).特色比較:
這兩個function都可以用來排序一個list
差別在於
sorted()會回傳一個排序好新的list
sort()會直接修改原始的list並排序完成
(3).範例:
a = [2, 4, 3, 5, 1]
sorted(a)
結果:[1, 2, 3, 4, 5]
print(a)
結果:[2, 4, 3, 5, 1]
a.sort()
print(a)
結果:[1, 2, 3, 4, 5]
(4).結論:
如果原始的list不需要保留下來的話,可以使用sort()來排序
如果要保留原本的list,就用sorted()來產生一個排序好的新list
(5).注意:sorted()應用性比較廣
sort()只能用在list上排序,
而sorted()可用來排序任何的iterable(string, 字典dict, tuple...)
成果圖片: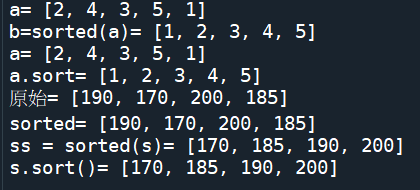
程式碼內容
|
範例7-13:一般排序 |
(6).範例7-13:一般排序
s = [190,170,200,185]
print('原始=',s)
sorted(s)
print('sorted=',s)
ss = sorted(s)
print('ss = sorted(s)=',ss)
s.sort()
print('s.sort()=',s)
成果圖片: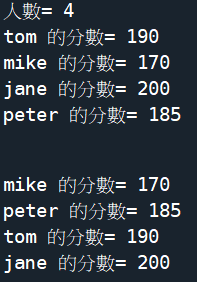
程式碼內容
|
(7).範例7-14:進階範例:二維串列,顯示資料 |
(7).範例7-14:進階範例:二維串列,顯示總人數,顯示每個人的分數,顯示排序
資料是個串列,元素是tuple
(A).沒有排序
#進階範例:二維串列,顯示總人數,顯示每個人的分數,顯示排序(資料是個串列,元素是tuple)
def show(var1):
print('人數=',len(var1))
for v in var1:
print(v[0],'的分數=',v[1])
(B).有排序:sort by 分數,根據分數來排序
print('\n')
var2 = sorted(var1,key = lambda x:x[1])
for v in var2:
print(v[0],'的分數=',v[1])
s = [('tom',190),('mike',170),('jane',200),('peter',185)]
show(s)
成果圖片:
程式碼內容
|
範例7-15:根據年紀大小排序 |
(B).範例7-15:根據年紀大小排序,由小排大
#☎公式:sorted(串列, key = lambda x : x[編號])
students = [
('tom', 180, 20),
('marry', 165, 18),
('john', 175, 30),
('peter', 172, 22),
]
# sort by age根據年紀大小排序
stu = sorted(students, key = lambda x : x[2])
print(stu)
# sort by age根據年紀大小排序,反向
stu = sorted(students, key = lambda x : x[2], reverse=True)
print(stu)
#☎注意:三種反向排序的寫法sorted(串列, key = lambda x : x[編號])
(i).sorted(lst, key=lambda x: x[1], reverse=True)
(ii).
import operator
sorted(lst, key=operator.itemgetter(1), reverse=True)
成果圖片:
程式碼內容
|
範例:依照姓名字母排序 |
(C).依照姓名字母排序
#☎注意:在for迴圈來排序方法:for v in sorted(var1):
#☎注意:sorted(tuple變數,或是串列變數)
stu = [('tom',190),('mike',170),('jane',200),('peter',185)]
stu2 = sorted(stu, key=lambda x:x[0])
print(stu2)
#反向排序
stu2 = sorted(stu, key=lambda x:x[0],reverse=True)
print(stu2)
成果圖片:
程式碼內容
|
進階範例7-16:字典dict,依照英文名字排序 |
(8).進階範例7-16:字典dict,依照英文名字排序,二種方法:
#字典dict排序方法一:sorted(字典, key=lambda x:x[0])
#字典dict排序方法二:[(k,字典[k]) for k in sorted(字典.keys())]
方法一:
#☎注意:字典dict的排序重點在sorted(stu.items()
stu = {'tom':'湯姆','mike':'麥克','peter':'彼德'}
stu2 = sorted(stu.items(), key = lambda x:x[0])
print(stu2)
注意:print(字典),若要顯示key與value,就要指定stu.items()
成果圖片:
程式碼內容
(9).進階範例7-16:字典dict,依照總分排序
#注意:dict本身就是2D的資料結構,所以外面不需要再加上[..]
stu = {'tom':190,'mike':170,'jane':200,'peter':185}
stu2 = sorted(stu.items(), key = lambda x:x[1])
print(stu2)
注意:print(字典),若要顯示key與value,就要指定stu.items()
成果圖片:
程式碼內容
|
進階範例7-17:字典dict,依照總分排序 |
(10).進階範例7-17:字典dict,依照總分排序二種方法:
#字典dict排序方法一:sorted(字典, key=lambda x:x[0])
#字典dict排序方法二:[(k,字典[k]) for k in sorted(字典.keys())]
方法二:
stu = {'tom':190,'mike':170,'jane':200,'peter':185}
#根據keys排序
stu2 = [(k,stu[k]) for k in sorted(stu.keys())]
print(stu2)
#根據values排序
stu3 = [v for v in sorted(stu.values())]
print(stu3)
成果圖片:
程式碼內容
|
進階範例7-18:集合set,依照總分排序 |
(11).進階範例7-18:集合set,依照總分排序
stu = {('tom',190),('mike',170),('jane',200),('peter',185)}
或是
stu = [('tom',190),('mike',170),('jane',200),('peter',185)]
#方法一OK:sorted(stu, key = lambda x:x[1])
stu1 = sorted(stu, key = lambda x:x[1])
print(stu1)
##方法二失敗:因為集合set沒有stu.keys(),或是stu.values(): [(k,字典[k]) for k in sorted(字典.keys())]
#(X)stu1 = [(k,stu[k]) for k in sorted(stu.values())]
#(X)print(stu1)
成果圖片:
程式碼內容
|
範例7-19:使用函數查詢(tuple,list,dict,set) |
15.使用函數查詢元素:tuple,串列list,字典dict,集合set
(1).範例7-19:查詢元素是否在tuple內,
#☎有七種方法:
(A).if txt in a
(B).res = a.index(s)
(C).matches = [x for x in lst if fulfills_some_condition(x)]
(D).matches = (x for x in lst if x > 6)
(E).next(x for x in lst if ...)
(F).for index, sublist in enumerate(lists):
if sublist[0] == key:
(G).[i for i,x in enumerate([1,2,3,2]) if x==2]
方法1:
#☎注意:查詢是否在tuple內,方法1:最簡單,直接if txt in a:
#☎注意:查詢是否在tuple內,方法2:[i for i in a if txt==i]
a = ('tom','mike','peter','jane','marry')
def find_tuple(txt,a):
result = [i for i in a if txt==i]
return result
s = input('請輸入查詢姓名?')
res = find_tuple(s,a)
print(res)
方法2:
a = ('tom','mike','peter','jane','marry')
def find_tuple(txt,a):
if txt in a:
return txt + '存在tuple內'
else:
return txt + '不存在tuple內'
s = input('請輸入查詢姓名?')
res = find_tuple(s,a)
print(res)
方法3:python enumerate用法
enumerate()是python的內置函數
enumerate在字典上是枚舉、列舉的意思
對於一個可反覆運算的(iterable)/可遍歷的物件(如清單、字串),enumerate
將其組成一個索引序列,利用它可以同時獲得索引和值
enumerate多用於在for迴圈中得到計數
成果圖片: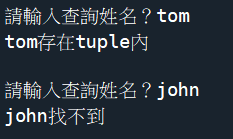
程式碼內容
|
範例7-20:查詢元素是否在串列list內 |
(2).範例7-20:查詢元素是否在串列list內,
一般一維串列:if txt in a
a=['tom','mike','peter','yellow']
def find_tuple(txt,a):
if txt in a:
return txt + '存在list內'
else:
return txt + '不存在list內'
s = input('請輸入查詢姓名?')
res = find_tuple(s,a)
print(res)
成果圖片: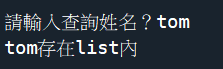
程式碼內容
|
範例7-21:一維串列:a.index(txt) |
範例7-21:一般一維串列:a.index(txt)
[1,2,3].index(2) # => 1
[1,2,3].index(4) # => ValueError
a=['tom','mike','peter','yellow']
name = input('請輸入查詢姓名?')
try:
res = a.index(name)
print(name+'找到了,在編號為'+str(res)+'的位置')
except ValueError:
print(name+'找不到')
成果圖片:
程式碼內容
|
範例7-22:一維串列 enumerate(a) if s==x] |
範例7-22:一般一維串列:[x+'找到了' for i,x in enumerate(a) if s==x]
a=['tom','mike','peter','yellow']
name = input('請輸入查詢姓名?')
res = [x for i,x in enumerate(a) if x==name]
if res==[]:
print(name+'找不到')
else:
print(name+'找到了')
成果圖片:
程式碼內容
|
範例7-23:二維串列的搜尋( |
範例:二維串列的搜尋(第一個元素,或是查詢第二個元素)
#☎注意:二維串列若用一維串列的搜尋方法,都是找不到,
例如:if txt in a
例如:res = a.index(s)
範例7-23
#二維串列的搜尋,只有一種方法
#方法7:查詢元素[x+'姓名為'+y for i,(x,y) in enumerate(a) if x==name]
a = [['tom','湯姆'],['mike','麥克'],['peter','彼德']]
name = input('請輸入查詢姓名?')
res = [x+'姓名為'+y for i,(x,y) in enumerate(a) if x==name]
if res==[]:
print(name+'找不到')
else:
print(name+'找到了',res)
成果圖片:
程式碼內容
|
(3).範例7-24:查詢元素是否在字典dict內 |
(3).範例7-24:查詢元素是否在字典dict內,
☎注意:enumerate(mydict.items())裡面的字典,必須要寫items(),不可以只有寫dict
#字典dict的搜尋,只有一種方法
#方法7:查詢元素[x+'姓名為'+y for i,(x,y) in enumerate(a.items()) if x==name]
#☎注意:enumerate(mydict.items())裡面的字典,必須要寫items(),不可以只有寫dict
a = {'tom':'湯姆','mike':'麥克','peter':'彼德'}
name = input('請輸入查詢姓名?')
res = [x+'姓名為'+y for i,(x,y) in enumerate(a.items()) if x==name]
if res==[]:
print(name+'找不到')
else:
print(name+'找到了',res)
成果圖片:
程式碼內容
|
(4).範例7-25:查詢元素是否在集合set內 |
(4).範例7-25:查詢元素是否在集合set內,
☎方法1:if txt in a
a={'tom','mike','peter','yellow'}
s = input('請輸入查詢姓名?')
if s in a:
print(s + '存在set內')
else:
print(s + '不存在set內')
☎方法2:一般一維:[x+'找到了' for i,x in enumerate(a) if s==x]
a={'tom','mike','peter','yellow'}
s = input('請輸入查詢姓名?')
b = [x+'找到了' for i,x in enumerate(a) if s==x]
if b==[]:
print('找不到')
else:
print(b)
☎二維集合set有點問題
A.正確二維set表示方法:
stu = {('tom',190),('mike',170),('jane',200),('peter',185)}
或是
stu = [('tom',190),('mike',170),('jane',200),('peter',185)]
B.錯誤的二維集合寫法
stu = {{'tom',190},{'mike',170},{'jane',200},{'peter',185}}
成果圖片: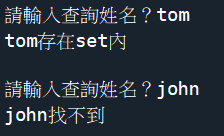
程式碼內容
|
| |
| |
| chp9.類別class |
| 目錄 |
1.類別的實用性 |
範例9-1:類別的參數設定,方法1 |
範例9-2:類別的參數設定,方法2 |
範例9-3:類別的參數設定,方法3:設定常數 |
|
範例9-4:類別的參數設定,方法4 |
範例9-5:類別的參數設定,方法5 |
範例9-6:類別的參數設定,方法6 |
範例9-7:類別的函數方法 |
|
範例9-8:類別的繼承Inheritance |
範例9-9:類別的多型polymorphism |
範例9-10:特殊用法 |
|
1.類別的實用性 |
1.類別的實用性:
在寫Python時,經常會用到模組(package),會讀取很多個py檔。
而這些py檔裡面,往往都是類別class及def結構函數。
所以類別class跟函數def是組成模組功能的最低架構。
☎類別class+函數def=>構成 模組(package)
|
範例9-1:類別的參數設定,方法1 |
2.類別:基本類別
(1).類別的參數設定,方法1:
☎直接設定參數(這些都是常數,無法傳遞變數)
範例9-1:exp9-1.py
class company:
companyname = '大獎科技公司'
address = '台南市忠孝東路九段9號'
tel = '06-5719898'
a1 = company()
print(a1.companyname,'聯絡電話=',a1.tel)
成果圖片:
exp9-1.py程式碼內容
|
範例9-2:類別的參數設定,方法2 |
(2).範例9-2:類別的參數設定,方法2:
☎類別的設定起始值函數:__init__()
這個就是C++的建構子函數
☎建構子語法:def __init__(self, 其他參數)
☎class的參數可以在__init__()裡面被設定,self.name='abc'
☎建構子如何設定預設值
語法:def __init__(self, 參數='預設值'):
範例:exp9-2.py
class stu:
def __init__(self,n1='匿名'):
self.name = n1
a1 = stu('張三')
print(a1.name)
a2 = stu('李四')
print(a2.name)
a3 = stu()
print(a3.name)
成果圖片:
程式碼內容
|
範例9-3:類別的參數設定方法3:設定常數 |
(3).範例9-3:類別的參數設定,方法3:設定常數
☎類別的參數設定很自由,也可以不在起始值函數內設定__init__()
☎方法:直接在class的__init__()外面設定:name='abc'
☎但是這個方法,一般都是設定常數,無法傳遞變數
☎pass代表沒有設定
☎__init__(裡面一定要有self)
範例:exp9-3.py
class stu():
school ='首府大學'
def __init__(self):
pass
a1 = stu()
print(a1.school)
成果圖片:
程式碼內容
|
範例9-4:類別的參數設定,方法4 |
(4).範例9-4:類別的參數設定,方法4:
☎類別的參數設定很自由,可以在類別外部設定
☎可以在類別外部,自己新增屬性
範例:exp9-4.py
class stu():
def __init__(self):
pass
a1 = stu()
a1.name='張三'
print(a1.name)
成果圖片:
程式碼內容
|
範例9-5:類別的參數設定,方法5 |
(5).範例9-5:類別的參數設定,方法5:
☎如果希望保密某些參數,不希望參數直接被取用,只需要加上兩條底線(self.__name)
☎若直接引用__name,會出現錯誤訊息
範例:exp9-5.py
class stu:
def __init__(self, n1):
self.__name = n1
a1 = stu('王五')
print(a1.name)
成果圖片:
程式碼內容
|
範例9-6:類別的參數設定,方法6 |
(6).範例9-6:類別的參數設定,方法6:
☎如何才能取得被保密的參數(self.__name)呢?
☎使用方法method(回傳函數):return self.__name
☎注意:函數getname()裡面要有(self),若沒有,就會出現錯誤
def getname(self)
範例:exp9-6.py
class stu:
def __init__(self,n1):
self.__name = n1
def getname(self):
return self.__name
a1 = stu('王五')
print(a1.getname())
成果圖片:
程式碼內容
|
範例9-7:類別的函數方法 |
(7).範例9-7:類別的函數方法
☎類別內的函數方法,可以用來存取參數,計算參數
範例:exp9-7.py,設計一個類別,用來處理銀行客戶的存款,領款等參數
☎注意:函數seemoney()裡面要有(self),若沒有,就會出現錯誤
def seemoney(self)
class bank:
def __init__(self,n1,m1,num1):
self.name = n1
self.money = m1
self.banknum = num1
def deposit(self,m1):
if m1 < 0:
print('存款金額不能為負數,存款被拒絕!')
else:
self.money += m1
def withdraw(self,m1):
if (self.money - m1) <0:
print('提款超過存款金額,提款被拒絕!')
else:
self.money -= m1
def seemoney(self):
return self.money
a1 = bank('王五',1000,'DW0001')
print(a1.seemoney())
a1.deposit(500)
print(a1.seemoney())
a1.withdraw(2000)
print(a1.seemoney())
a1.deposit(-500)
print(a1.seemoney())
成果圖片: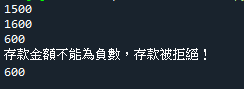
程式碼內容
|
範例9-8:類別的繼承Inheritance |
2.範例9-8:類別的繼承Inheritance
(1).例如:電腦computer是一個父類別,筆電notebook是電腦computer的一種,它必須繼承電腦computer類別的所有屬性
(2).繼承的指令:
父類別Parent class:class Computer:
子類別 child class:class Notebook(Computer):
(3).範例:exp9-8.py
☎在子類別的__init__內, 繼承父類別參數的方法: super().__init__(color,money)
☎注意:在子類別的__init__(內的父類別參數,不可再放預設值,否則,數值無法正確顯示
例如:(正確)super().__init__(color,money)
例如:(錯誤)super().__init__(color='黑色',money='0')
☎例如:繼承的函數裡面沒有self:super().__init__(color,money)
☎注意:函數show裡面要有(self),若沒有,就會出現錯誤
def show(self):
class computer:
def __init__(self,color='黑色',money='0'):
self.color = color
self.money = money
class notebook(computer):
def __init__(self, color,money,brand='',ram='',disk=''):
super().__init__(color,money)
self.brand = brand
self.ram = ram
self.disk = disk
def show(self):
print('筆電品牌=',self.brand)
print('記憶體=',self.ram,'硬碟=',self.disk)
print('外觀顏色=',self.color,'價格=',self.money)
a1 = notebook('紅色','25000','華碩龍騰300','6G','1TB')
a1.show()
成果圖片: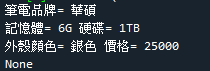
程式碼內容
|
範例9-9:類別的多型polymorphism |
3.範例9-9:類別的多型polymorphism
(1).特色:不同的類別可以定義相同名稱的函數方法,雖然函數名稱相同,但是卻能夠擁有不同的功能,這個就是類別的多型特色
(2).例如,要顯示,三台電腦的資料,都是呼叫show(),但是結果都是不一樣的
顯示格式內容
☎注意:函數show裡面要有(self),若沒有,就會出現錯誤
def show(self):
☎如何才能顯示多個串列的函數
def show_all(lists):
for b1 in lists:
print(b1.show())
呼叫函數執行顯示多個的方法:show_all([a1,a2,a3])
def show_all(lists):
(3).範例:exp9-9.py:
class computer:
def __init__(self,money,color):
self.money = money
self.color = color
def show(self):
print('外觀顏色=',self.color,'價格=',self.money)
class notebook(computer):
def __init__(self,money,color,brand,ram,disk):
super().__init__(money,color)
self.brand = brand
self.ram = ram
self.disk = disk
def show(self):
print('筆電品牌=',self.brand)
print('記憶體=',self.ram,'硬碟=',self.disk)
print('外觀顏色=',self.color,'價格=',self.money)
class desktop(computer):
def __init__(self,money,color,brand,ram,disk):
super().__init__(money,color)
self.brand = brand
self.ram = ram
self.disk = disk
def show(self):
print('桌上型電腦品牌=',self.brand,'外觀顏色=',self.color,'價格=',self.money)
print('記憶體=',self.ram,'硬碟=',self.disk)
#建立顯示多個串列的函數
def show_all(lists):
for b1 in lists:
print('/////////////////////////')
print(b1.show())
a1 = notebook('25000','紅色','華碩龍騰300','6G','1TB')
a2 = desktop('12000','白色','宏基桌上型電腦p9','10G','2TB')
a3 = computer('20000','藍色')
#把三台電腦都顯示資料
show_all([a1,a2,a3])
(4).結果
/////////////////
筆電品牌= 華碩龍騰300
記憶體= 6G 硬碟= 1TB
外觀顏色= 紅色 價格= 25000
//////////////
桌上型電腦品牌= 宏基桌上型電腦p9 外觀顏色= 白色 價格= 12000
記憶體= 10G 硬碟= 2TB
/////////////
外觀顏色= 藍色 價格= 20000
成果圖片: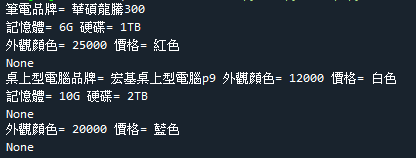
程式碼內容
|
範例9-10: |
4.範例9-10:特殊用法
(1).如果要判別兩個類別物件的價格,例如:物件1 > 物件2
解決方法:建立一個函數:def __gt__(self, other):
就能夠直接用物件1 > 物件2來做判斷力
比較self/other的屬性或方法
(2).特殊函數,與運算子的比對
https://www.brilliantcode.net/761/python-3-6-class/
方法名稱 用途
__lt__ 小於(<)
__le__ 小於等於(<=)
__eq__ 等於(==)
__ne__ 不等於(!=)
__gt__ 大於(>)
__ge__ 大於等於(>=)
__add__ +
__iadd__ +=
__sub__ –
__isub__ -=
__mul__ *
__imul__ *=
__truediv__ /
__itruediv__ /=
__floordiv__ //
__ifloordiv__ //=
__mod__ %
__imod__ %=
__pow__ **
__ipow__ **=
(3).例如:我要比較華碩筆電a1與宏基筆電a2的價格
(4).範例:exp9-10.py:
☎重點:def __gt__(self, other):
return a1.money > a2.money
(a1>a2) = True
class computer:
def __init__(self,color,money):
self.color = color
self.money = money
class notebook(computer):
def __init__(self,color,money,brand,ram,disk):
super().__init__(color,money)
self.brand = brand
self.ram = ram
self.disk = disk
def __gt__(self, other):
return a1.money > a2.money
def __lt__(self, other):
return a1.money < a2.money
def __eq__(self, other):
return a1.money == a2.money
a1 = notebook('紅色','25000','華碩龍騰300','6G','1TB')
a2 = notebook('白色','35000','宏基筆電','10G','2TB')
print(a1 > a2)
if a1 > a2:
print(a1.brand,'的價格高於',a2.brand)
elif a1 == a2:
print(a1.brand,'的價格等於',a2.brand)
else:
print(a1.brand,'的價格低於',a2.brand)
成果圖片: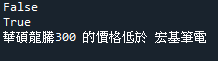
程式碼內容
|
| |
| |
| chp11.編碼的處理(Ascii,unicode,正規表示式(re) |
|
1.Ascii字元碼 |
範例:8位密碼隨機產生器 |
範例:8~12位密碼隨機產生器 |
2.unicode字元碼 |
|
顯示CJK UNIFIED IDEOGRAPH-597D的對應字元 |
顯示輸入任何字的unicode編碼 |
3.字串編碼,解碼 |
範例:把字串,以utf-8的16進位顯示 |
|
範例:把『好』顯示長度,轉utf-8 |
解碼decode |
正規表示式:三種查詢函數(match, search, findall) |
分割字串函數:split() |
|
取代字串函數:re.sub('舊','新',字串變數) |
進階正規表示式(關鍵字) |
進階正規表示式(關鍵字) |
|
1. |
1.Ascii字元碼
(1).範圍:大小寫英文字母、數字和一些符號(英文標點符號,數學符號),
比如:大寫字母 A 的字元碼是65,小寫字母 z 的字元碼是122
總共,128個Ascii字元碼
(2).python讀取Ascii的指令
範例:exp10_01.py
import string
import string #導入string這個模塊
print('輸出包含數字0~9的字符串',string.digits)
print('包含所有字母(大寫或小寫)的字符串',string.ascii_letters)
print('包含所有小寫字母的字符串',string.ascii_lowercase)
print('包含所有大寫字母的字符串',string.ascii_uppercase)
print('包含所有標點的字符串',string.punctuation)
print('16進位的字符',string.hexdigits)
print('8進位的字符',string.octdigits)
print('10進位數字,大小寫字母,標點符號,空白字符',string.printable)
print('空白字符',string.whitespace)
|
範例:密碼隨機產生器 |
(3).實用範例:exp10_02.py
A.目的:密碼隨機產生器
隨機產生8位數的密碼,密碼必須由數字與大小寫英文組成
import string
import random
def Num_password(n1):
txt = ''
for i in range(n1):
s1 = string.digits + string.ascii_letters
r1 = random.choice(s1)
txt += r1
return txt
a = Num_password(8)
print(a)
|
範例:8~12位密碼隨機產生器 |
(4).實用範例:exp10_03.py
A.目的:密碼隨機產生器
隨機產生8~12位數的密碼,密碼必須由數字與大小寫英文組成
import string
import random
def Num_password(n1,n2):
s1 = string.digits + string.ascii_letters
r1 = random.randint(n1,n2)
txt = ''
for i in range(r1):
a1 = random.choice(s1)
txt += a1
return txt
print(Num_password(8, 12))
|
unicode字元碼 |
2.unicode字元碼
(1).若要顯示各國文字,就必須用unicode才能顯示
(2).範例:exp10_04.py,顯示『你,好』的unicode
import unicodedata
a1 = unicodedata.name('你')
print('你的unicode編碼=',a1)
a1 = unicodedata.name('好')
print('你的unicode編碼=',a1)
|
顯示CJK UNIFIED IDEOGRAPH-597D的對應字元 |
(3).範例:exp10_05.py,顯示『CJK UNIFIED IDEOGRAPH-597D』的對應字元
import unicodedata
a1 = 'CJK UNIFIED IDEOGRAPH-597D'
print('CJK UNIFIED IDEOGRAPH-597D的字元=',unicodedata.lookup(a1))
|
顯示輸入任何字的unicode編碼 |
(4).範例:exp10_06.py,寫個函數,可以顯示輸入任何字的unicode編碼
import unicodedata
def transferunicode(t1):
return unicodedata.name(t1)
print('台=',transferunicode('台'))
#print('台=',transferunicode('台灣')) #只能夠輸入一個字
print('b=',transferunicode('b'))
print('1=',transferunicode('1'))
|
3.字串編碼,解碼 |
3.字串編碼,解碼
(1).前面所述都是單一字元的編碼(ascii,unicode)
本節講的是字串編碼
(2).編碼(encode) = 把字串轉換成位元組(byte)
解碼(decode) = 把已經轉換的位元組(byte),再轉回字串
(3).什麼是utf-8編碼?Unicode 和 UTF-8 是什麼關係?
觀念:Unicode 是字符集,而UTF-8 是編碼。
(4).網頁的編碼大略上可以分成兩類,ANSI,Unicode
A.ANSI編碼(encode)
例如,早期的中文編碼Big5,它僅是ANSI的其中一種編碼方式,支援約16000個繁體中文, 可應付大多文書工作,不過若是遇到罕見字,也無法支援,如: 「犇」「鱻」「堃」
B.UTF-8 :
1. 採用變動大小,中文字使用 3 bytes,英文則維持 1 byte 因此若轉碼後,資料庫整體會變成 1.5 倍大,200MB(Big5) -> 300MB(UTF-8)
2. 支援所有語言文字,還有一些怪怪圖形
3. 簡體與正體中文重複字只定義一次,例如說,簡體的”山”,跟正體的”山” 是同一個 UTF-8 編碼
(2).python的字串編碼函數 = encode()
功能:可以把字串,轉換成16進位表示
1個字元組,可以提供2個16進位表示
(3).公式:四種編碼轉換方式
A.轉成ascii字串編碼:a = '大家好'.encode('ascii')
B.轉成utf-8字串編碼:a = '大家好'.encode('utf-8')
C.轉成unicode-escape字串編碼:a = '大家好'.encode
('unicode-escape')
#功用:把unicode編碼使用\u表示
D.轉成latin-1字串編碼:a = '大家好'.encode('latin-1')
|
範例:把字串,以utf-8的16進位顯示 |
(4).範例:exp10_07.py
#目的:把字串,以utf-8的16進位顯示
print('B.轉成utf-8字串編碼 = ',"大家好".encode('utf-8'))
print("C.轉成unicode-escape字串編碼 = ","大家好".encode('unicode-escape'))
結果:
B.轉成utf-8字串編碼 = b'\xe5\xa4\xa7\xe5\xae\xb6\xe5\xa5\xbd'
C.轉成unicode-escape字串編碼 = b'\\u5927\\u5bb6\\u597d'
|
範例:把『好』顯示長度,轉utf-8 |
(5).範例:exp10_08.py
#目的:把中文字『好』顯示長度,轉成utf-8後,再看長度
a1 = '好'
print(a1,'的長度=',len(a1))
a2 = a1.encode('utf-8')
print(a2,'的長度=',len(a2))
結果:
好 的長度= 1
b'\xe5\xa5\xbd' 的長度= 3
|
解碼decode |
(6).解碼decode
A.功能:可以把16進位表示的位元組,解碼回原來的字串
B.公式:
字串 = 位元組.decode('utf-8')
字串 = 位元組.decode('unicode-escape')
範例:exp10_09.py
#目的:把中文字『好』顯示長度,轉成utf-8後,再轉回來字串
a1 = '好'
a2 = a1.encode('utf-8')
print(a1,'的utf-8編碼=',a2)
a3 = a2.decode('utf-8')
print(a2,'的原始字串=',a3)
結果:
好 的utf-8編碼= b'\xe5\xa5\xbd'
b'\xe5\xa5\xbd' 的原始字串= 好
|
正規表示式
三種查詢函數(match, search, findall) |
2.正規表示式(regular expression)
模組re的各種字串處理函數:
(1).三種查詢函數(match, search, findall)
(A).re.match(t1,s1):尋找是否t1在s1的『開頭』,若無傳回None,若有則傳回t1表示找到了(可以使用group(num) 或 groups() 匹配对象函数来获取匹配表达式)
import re
s1 = '天增歲月人壽'
a1 = re.match('天增',s1)
print(a1.group())
(B).re.search(t1,s1):尋找是否t1在s1裡面,若無傳回None,若有則傳回t1表示找到了
import re
s1 = '天增歲月人壽'
a1 = re.search('天增',s1)
print(a1.group())
re.match與re.search的區別
re.match只匹配字串的『開始』,如果字串開始不符合規則運算式,則匹配失敗,函數返回None;
而re.search匹配整個字串,直到找到一個匹配。
(C).re.findall(t1,s1):尋找是否t1在s1裡面,若無傳回[],若有則傳回串列
(顯示時,不需要a1.group())
#findall(),傳回串列,顯示結果時,不需要a1.group()
a1 = re.findall('大',s1)
if a1 != []:
print(a1)
else:
print('找不到')
|
分割字串函數:split() |
(2).分割字串函數:split()
公式:re.split('字元',字串變數),轉成串列
傳回取代後的串列
a1 = re.split('大',s1)
if a1 != []:
print(a1)
else:
print('找不到')
|
取代字串函數:re.sub('舊','新',字串變數) |
(3).取代字串函數:re.sub('舊','新',字串變數)
公式:
字串 = re.sub('舊','新',字串變數)
傳回取代後的字串變數
#取代字串函數:re.sub('舊','新',字串變數)
a1 = re.sub('歲月','年紀',s1)
if a1 != None:
print(a1)
else:
print('找不到')
範例:exp10_10.py
import re
s1 = '天增歲月人增壽'
#match()
a1 = re.match('歲月',s1)
if a1 != None:
print('match()找',a1.group())
else:
print('找不到')
#search()
a1 = re.search('歲月',s1)
if a1 != None:
print(a1.group())
else:
print('找不到')
#findall(),傳回串列,顯示結果時,不需要a1.group()
☎重點:findall的使用比較方便,但是要注意它的回傳值是串列[]
a1 = re.findall('大',s1)
if a1 != []:
print(a1)
else:
print('找不到')
#取代字串函數:re.sub('舊','新',字串變數)
a1 = re.sub('歲月','年紀',s1)
if a1 != None:
print(a1)
else:
print('找不到')
#分割字串函數:re.split('字元',字串變數),轉成串列
a1 = re.split('大',s1)
if a1 != []:
print(a1)
else:
print('找不到')
|
進階正規表示式(關鍵字) |
3.進階正規表示式(關鍵字)
(1).判別是否有『數字』:re.findall('\d',str)
(2).判別是否有『非數字』:re.findall('\D',str)
(3).判別是否有『空白』:re.findall('\s',str)
(4).判別是否有『非空白』:re.findall('\S',str)
(5).判別是否有『數字,字母,_,中文字字』:re.findall('\w',str)
(6).判別是否有『非數字,字母,_,中文字』:re.findall('\W',str)
範例:exp10_11.py
import re
password = 'r3^a 2r_大家9'
a1 = re.findall('\d',password)
print('顯示數字的部分=', a1)
a1 = re.findall('\D',password)
print('顯示非數字的部分=', a1)
a1 = re.findall('\s',password)
print('顯示空白的部分=', a1)
a1 = re.findall('\S',password)
print('顯示非空白的部分=', a1)
a1 = re.findall('\w',password)
print('顯示『數字,字母,_,中文字=', a1)
a1 = re.findall('\W',password)
print('顯示『數字,字母,_,中文字=', a1)
|
進階正規表示式(關鍵字) |
4.進階正規表示式(關鍵字)
(1).判別是否有『字串出現在開頭』:re.findall('^天增',str)
(2).判別是否有『字串出現在結尾』:re.findall('門。$',str)
(3).判別是否有『這幾個字元』:re.findall('[增滿]',str)
(4).判別是否有『不是這幾個字元的其它字元』:re.findall('[^增滿]',str)
(5).判別是否有『非數字,字母,_,中文字』:re.findall('\W',str)
(6).判別是否有『是否字元『門』後面緊接著非數字,字母,_,中文字字』:
re.findall('滿門\W',str)
(7).判別是否有『是否字元『滿』後面先有一個字元,再緊接著非數字,字母,_,中文字字』:re.findall('滿.\W',str)
範例:exp10_12.py
import re
s = "天增歲月人增壽,春滿乾坤福滿門。"
a1 = re.findall('^天增',s)
print('是否以天增開頭=',a1)
a1 = re.findall('滿門。$',s)
print('是否以滿門。結尾=',a1)
a1 = re.findall('[增滿]',s)
print('是否有增滿這個字=',a1)
a1 = re.findall('[^增滿]',s)
print('顯示非增滿的其它字=',a1)
a1 = re.findall('\W',s)
print('顯示非字母數字的其它字=',a1)
a1 = re.findall('滿門\W',s)
print('是否滿門後緊接著非字母數字的其它字=',a1)
a1 = re.findall('滿.\W',s)
print('是否滿後面是一個字,如何緊接著非字母數字的其它字=',a1)
|
| |
| |
| chp12.資料夾模組,檔案模組(os),存取純文字檔,存取csv檔 |
|
1.資料夾模組:os |
範例12-1:建立目錄,刪除目錄,顯示檔案 |
範例12-2:把該目錄下方的資料夾以串列顯示 |
範例12-3:到某個目錄查詢指定檔案名稱 |
|
範例12-4:顯示目前目錄下的完整路徑(目錄+檔案名稱) |
範例12-5:更有效率的顯示目前目錄下的完整路徑 |
3.存取文字檔 |
範例12-6:讀取exp12-1.py的所有內容 |
|
範例12-7:使用迴圈,一行一行讀取exp12-1.py的所有內容 |
範例12-8:讀取目前目錄下所有檔案的文字內容 |
範例12-9:存入exp12-10.py,印出新年快樂 |
範例12-11:存入exp12-10.py,印出新年快樂,但是用try...except |
|
範例12-12:把exp112-10.py,複製到copy.py檔案 |
4.存取csv:範例12-13:讀入一個已經存在的csv檔案 |
範例12-14:把第一行的標題結合資料數據,形成字典格式dict |
範例12-15:新增一個新檔案,加入一筆標題,加入一筆記錄 |
|
範例12-16:開啟一個舊檔,加入一筆標題,加入一筆記錄 |
範例12-17:已知字典變數數據,要寫入檔案 |
5.存取二進位檔案:範例12-18:把對聯文字,存入二進位檔案 |
|
1.資料夾模組:os |
1.功能:刪除資料夾(檔案),儲存資料夾(檔案),修改資料夾(檔案),查詢資料夾(檔案)
2.模組:os
(1).常用指令:
import os
#☎到指定目錄:os.chdir(目錄)
#☎回傳目前目錄的所有資料夾與檔案:os.listdir(目錄)
#☎判別目前是資料夾嗎?:os.path.isdir(目錄)
#☎判別目前是檔案嗎?:os.path.isfile(目錄)
#☎回傳目前檔案大小:os.path.getsize(目錄)
#☎回傳目前資料夾名稱:os.getcwd()
#☎建立資料夾名稱:os.mkdir(目錄,dir_fd=None)
dir_fd=None 表示是絕對路徑
#☎刪除資料夾名稱:os.rmdir(目錄,dir_fd=None)
#☎刪除檔案名稱:os.remove(目錄,dir_fd=None)
#☎顯示目錄與檔案名稱:os.path.join(目錄名稱,檔案名稱)
|
範例12-1:建立目錄,刪除目錄,顯示檔案 |
(2).範例12-1.py
import os
#顯示目前目錄
a1 = os.getcwd()
print('目前目錄=',a1)
#到c:\\目錄
os.chdir('c:\\')
a1 = os.getcwd()
print('目前目錄=',a1)
#顯示所有目錄與檔案
a2= os.listdir(a1)
print('所有目錄與檔案=',a2)
#只顯示目錄
for i in a2:
if os.path.isdir(i)==True:
print('這個是目錄=',i)
elif os.path.isfile(i)==True:
print('這個是檔案=',i)
print('檔案大小=',os.path.getsize(i))
#建立一個目錄
os.mkdir('test')
#刪除一個目錄
os.rmdir("test")
成果圖片: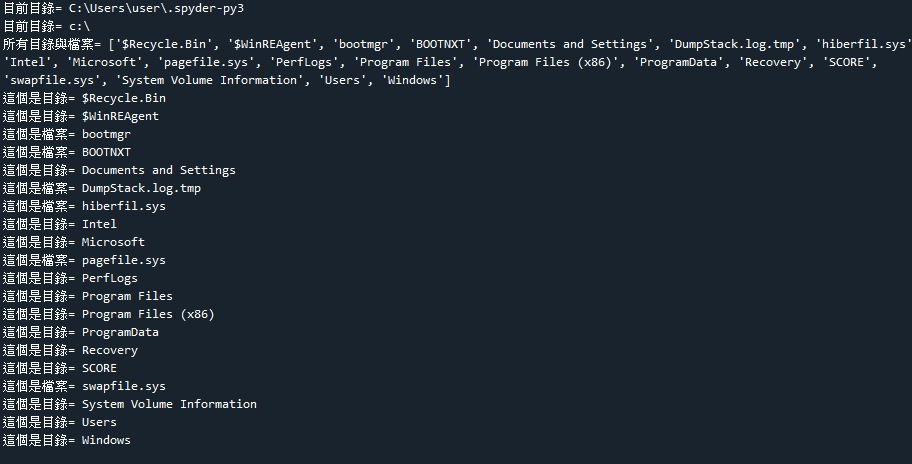
程式碼內容
|
範例12-2:把該目錄下方的資料夾以串列顯示 |
(3).範例12-2.py
目的:類似上個範例,用一行的for迴圈,把該目錄下方的資料夾以串列顯示
import os
#到c:\\目錄
os.chdir('c:\\')
a1 = os.getcwd()
print('目前目錄=',a1)
#顯示所有目錄與檔案
a2= os.listdir(a1)
#只顯示目錄
print('這個是目錄=',[i for i in a2 if os.path.isdir(i)==True])
print('這個是檔案=',[i for i in a2 if os.path.isfile(i)==True])
成果圖片:
程式碼內容
|
範例12-3:到某個目錄查詢指定檔案名稱 |
2.模組:glob
(1).常用指令:
import glob
#☎到某個目錄查詢指定檔案名稱:os.glob.glob(指定檔名)
(4).範例12-3.py
目的:到某個目錄查詢指定檔案名稱(*.jpg):os.glob.glob(指定檔名)
import os, glob
os.chdir('c:\\')
folder1 = os.getcwd()
file1 = '*.jpg'
a1 = glob.glob(file1)
print(a1)
程式碼內容
|
範例12-4:顯示目前目錄下的完整路徑(目錄+檔案名稱) |
(5).範例12-4.py
目的:顯示目前目錄下的完整路徑(目錄+檔案名稱)
#☎顯示目錄與檔案名稱:os.path.join(目錄名稱,檔案名稱)
#☎注意:如果用手動連接,會出現錯誤:print(d1+'\'+i)
import os
a1 = os.listdir()
#print(a1)
#目前目錄名稱
d1 = os.getcwd()
#每個檔案都顯示完整路徑
for i in a1:
#注意用手動連接,會出現錯誤:print(d1+'\'+i)
print(os.path.join(d1,i))
程式碼內容
|
範例12-5:更有效率的顯示目前目錄下的完整路徑 |
(6).範例12-5.py
目的:更有效率的顯示目前目錄下的完整路徑(目錄+檔案名稱):os.walk
(path)
#☎快速的完整顯示目錄與檔案名稱:for root,dirs,files in os.walk(path)
#☎顯示目錄與檔案名稱:os.path.join(目錄名稱,檔案名稱)
#☎注意:如果用手動連接,會出現錯誤:print(d1+'\'+i)
import os
#目前目錄名稱
d1 = os.getcwd()
#快速吸收每個檔案都顯示完整路徑
for root,dirs,files in os.walk(d1):
for file in files:
#注意用手動連接,會出現錯誤:print(d1+'\'+i)
print(os.path.join(root, file))
程式碼內容
|
3.存取文字檔 |
3.存取文字檔
(1).常用指令
#☎開啟檔案:a1 = open(檔名,模式mode,文字子編碼)
a1 = open('exp11_01.py','rt',encoding='utf-8')
#☎模式mode種類:
r:只能讀取
w:可以寫入(會先刪除原先的檔案)
x:可以寫入(但是檔案不能已經存在,避免覆蓋)
a:可以寫入(把寫入資料,寫在檔案最後加入)
t:純文子檔
b:二進位檔
+:可以讀取,可以寫入
#☎讀取全部檔案:a1.read()
#☎讀取檔案裡面的一行:a1.readline()
#☎讀取檔案裡面的每一行,並把它們變成串列:a1.readlines()
#☎把字串寫入檔案:a1.write(字串)
#☎把字串寫入檔案:print(字串,file=檔案物件)
檔案物件 = open('exp11_01.py','rt',encoding='utf-8')
|
範例12-6:讀取exp12-1.py的所有內容 |
(1).範例12-6.py
目的:讀取exp12-1.py的所有內容
f1 = 'exp12-1.py'
a1 = open(f1,'rt',encoding='utf-8')
print(a1.read())
a1.close()
程式碼內容
|
範例12-7:使用迴圈,一行一行讀取exp12-1.py的所有內容 |
(2).範例12-7.py
目的:使用迴圈,一行一行讀取exp12-1.py的所有內容
f1 = 'exp11_01.py'
a1 = open(f1,'rt',encoding='utf-8')
for i in a1:
print(i)
a1.close()
程式碼內容
|
範例12-8:讀取目前目錄下所有檔案的文字內容 |
(3).範例12-8.py
目的:讀取目前目錄下所有檔案的文字內容
import os
a1 = os.listdir()
for i in a1:
if os.path.isfile(i)==True:
print('檔案名稱=',i)
f1 = open(i,'rt',encoding='utf-8')
print(f1.read())
f1.close()
程式碼內容
|
範例12-9:存入exp12-10.py,印出新年快樂 |
(4).範例12-9.py
目的:寫一個程式,存入exp12-10.py,印出『新年快樂』
f1 = 'exp12-10.py'
txt ="""
s1 = input('輸入您的姓名=')
print(s1,'新年快樂')
"""
#將程式寫入檔案內
a1 = open(f1,'wt',encoding='utf-8')
a1.write(txt)
a1.close()
程式碼內容
|
範例12-11:存入exp12-10.py,印出新年快樂,但是用try...except |
(5).範例12-11.py
目的:寫一個程式,存入exp12-10.py,印出『新年快樂』,但是用try...except
測試寫入程式是否發生問題?
f1 = 'exp12-10.py'
txt ="""
s1 = input('輸入您的姓名=')
print(s1,'新年快樂')
"""
#將程式寫入檔案內
try:
a1 = open(f1,'twt',encoding='utf-8')
a1.write(txt)
a1.close()
except:
print('無法寫入檔案')
程式碼內容
|
範例12-12:把exp112-10.py,複製到copy.py檔案 |
6).範例12-12.py
目的:複製檔案,把exp12-10.py,複製到copy.py檔案
f1 = 'exp12-10.py'
f2 = 'copy.py'
a1 = open(f1,'rt',encoding='utf-8')
a2 = open(f2,'wt',encoding='utf-8')
txt = a1.read()
a2.write(txt)
a1.close()
a2.close()
程式碼內容
|
4.存取csv:範例12-13:讀入一個已經存在的csv檔案 |
4.存取csv檔
(1).範例12-13.py
讀入一個已經存在的csv檔案
(下載檔案: customer.csv到exp12-11.py同一個目錄)
#讀入一個已經存在的csv檔案: customer.csv
#方法1:缺點,無法指定印出:第二筆記錄的公司名稱(因為都是純文字,不是陣列或串列list)
a1 = open('customer.csv','rt',encoding='utf-8')
txt = a1.read()
print(txt)
a1.close()
#方法2:import csv模組,然後用with open('customer.csv','rt',encoding='utf-8')as fin:
import csv
with open('customer.csv','rt',encoding='utf-8')as fin:
rows = csv.reader(fin,delimiter=',')
#指定印出:第二筆記錄的公司名稱
listrow = list(rows)
print(listrow[1][1])
for i in listrow:
print(i)
結果:包括第一行的標題
[['客戶編號', '公司名稱', '連絡人', '連絡人職稱'], ['ALFKI', '三川實業有限公司', '陳小姐', '業務'], ['ANATR', '東南實業', '黃小姐', '董事長'], ['ANTON', '坦森行貿易', '胡先
生', '董事長']]
若是希望把第一行當作是標題,而不是資料列的做法
而且希望顯示字典(dictionary),顯示把{標題欄位1:數據},{標題欄位2:數據}....
程式碼內容
|
範例12-14:把第一行的標題結合資料數據,形成字典格式dict |
(2).範例12-14.py
#目的:把第一行的標題結合資料數據,形成字典格式dict
#☎重點:rows = csv.DictReader(fin,delimiter=',')
不是rows = csv.Reader(fin,delimiter=',')
#把customer.csv第一行的標題結合資料數據,形成字典格式dict
import csv
with open('customer.csv','r',encoding='utf-8')as fin:
rows = csv.DictReader(fin,delimiter=',')
for row in rows:
print(row)
print(row['公司名稱'])
結果:
OrderedDict([('\ufeff客戶編號', 'ALFKI'), ('公司名稱', '三川實業有限公司'), ('連絡人', '陳小姐'), ('連絡人職稱', '業務')])
三川實業有限公司
OrderedDict([('\ufeff客戶編號', 'ANATR'), ('公司名稱', '東南實業'), ('連絡人', '黃小姐'), ('連絡人職稱', '董事長')])
東南實業
OrderedDict([('\ufeff客戶編號', 'ANTON'), ('公司名稱', '坦森行貿易'), ('連絡人', '胡先生'), ('連絡人職稱', '董事長')])
坦森行貿易
程式碼內容
|
範例12-15:新增一個新檔案,加入一筆標題,加入一筆記錄 |
(3).範例12-15.py
#目的:新增一個新檔案,加入一筆標題,加入一筆記錄
#☎重點:wt = csv.writer(fout,delimiter=',')
wt.writerow(['AL001','全聯有限公司','張三','司機'])
#新增一個新檔案test.csv,加入一筆標題,加入一筆記錄:['AL001','全聯有限公司','張三','司機']
import csv
with open('test1.csv','w',encoding='utf-8',newline='')as fout:
#若不設定換行字元 = newline='',則會造成間隔一行(多一行空白行)
wt = csv.writer(fout,delimiter=',')
wt.writerow(['客戶編號', '公司名稱', '連絡人', '連絡人職稱'])
wt.writerow(['AL001','全聯有限公司','張三','司機'])
print('已經成功加入test.csv檔案')
程式碼內容
|
範例12-16:開啟一個舊檔,加入一筆標題,加入一筆記錄 |
(4).範例12-16.py
#目的:開啟一個舊檔test1.csv,加入一筆標題,加入一筆記錄
#☎重點:with open('test1.csv','a',newline='')as fout:
#☎其中的'a' = 寫入,若是原本的檔案已經存在,保留原本資料,在最後新增
import csv
with open('test1.csv','a',encoding='utf-8',newline='')as fout:
wt = csv.writer(fout,delimiter=',')
wt.writerow(['客戶編號', '公司名稱', '連絡人', '連絡人職稱'])
wt.writerow(['AL005','7-11有限公司','李四','經理'])
print('已經成功加入test.csv檔案')
程式碼內容
|
範例12-17:已知字典變數數據,要寫入檔案 |
(5).範例12-17.py
#目的:已知字典變數數據,要寫入檔案(以字典方式寫入,但是卻顯示第一行標題,第二行資料數據)
#☎重點:wt = csv.DictWriter(fout,atitle)
wt.writeheader()
wt.writerow(adata)
import csv
atitle = ['客戶編號', '公司名稱', '連絡人', '連絡人職稱']
with open('test2.csv','w',newline='')as fout:
wt = csv.DictWriter(fout,atitle)
wt.writeheader()
wt.writerow({'客戶編號':'AL005', '公司名稱':'7-11有限公司', '連絡人':'李四', '連絡人職稱':'主任'})
wt.writerow({'客戶編號':'AL006', '公司名稱':'麥當勞公司', '連絡人':'王五', '連絡人職稱':'經理'})
結果:
客戶編號,公司名稱,連絡人,連絡人職稱
AL005,7-11有限公司,李四,主任
AL006,麥當勞公司,王五,經理
程式碼內容
|
5.存取二進位檔案:範例12-18:把對聯文字,存入二進位檔案 |
5.存取二進位檔案
(1).公式:
(2).範例12-18.py
把對聯文字,存入二進位檔案
程式碼內容
|
| |
| |
| chp13.標準函式庫(日期時間,iterate,itertools,filter) |
| 1.日期時間函式庫 |
範例13-1:模組datetime(顯示日期,時間 |
範例13-2:模組date(只能顯示日期) |
範例13-3:模組timedelta(間隔日期,時間) |
範例13-4:傳回自1970年1月1日凌晨0:0:0開始至今的秒數 |
| 範例13-5:計算呼叫某個函式所需要的時間 |
2.可以迭代(iterate)的函式庫= itertools,函式enumerate,zip,filter,map,reduce |
範例13-6:顯示陣列 |
範例13-7:zip(a,b)是結合兩個可迭代物 |
範例13-8:模組itertools:給定起始值,遞增值,就可以產生無窮數列 |
| 範例13-9:filter(過濾函數def或lambda,資料列) |
範例13-10:過濾模組map |
範例13-11:操作每個元素模組reduce |
範例13-12:套件collections-模組OderedDict:可將兩個串列,合併形成成一個字典dict |
範例13-13:模組deque:操作可迭代資料列,新增,刪除,反轉 |
| 例13-14:模組dCounter:可計算可迭代資料列相同元素的次 |
|
|
|
|
1.日期時間函式庫 |
1.日期時間函式庫
(1).時間函式庫有三個:datetime,date,time模組
模組datetime:可以處理日期與時間函式庫,可以傳回目前的日期,時間
模組date:可以傳回目前的日期
|
範例13-1:模組datetime(顯示日期,時間 |
(2).範例13-1:模組datetime(顯示日期,時間)
公式:
from datetime import datetime
a1 = datetime.today()
y1 = a1.year
範例13-1.py
from datetime import datetime
a1 = datetime.today()
print('現在日期時間 =',a1)
y1 = a1.year
m1 = a1.month
d1 = a1.day
h1 = a1.hour
min1 = a1.minute
s1 = a1.second
print(y1,'年',m1,'月',d1,'日',h1,'時',min1,'分',s1,'秒')
程式碼內容
|
範例13-2:模組date(只能顯示日期) |
(3).模組date(只能顯示日期)
公式:
from datetime import date
a1 = datetime.today()
y1 = a1.year
範例13-2.py
from datetime import date
a1 = date.today()
print('現在日期=',a1)
y1 = a1.year
m1 = a1.month
d1 = a1.day
print(y1,'年',m1,'月',d1,'日')
程式碼內容
|
範例13-3:模組timedelta(間隔日期,時間) |
(4).模組timedelta(間隔日期,時間)
公式:
from datetime import datetime,timedelta
a1 = datetime.today()
delta2 = timedelta(days=5)
a2 = a1 + delta2
範例13-3.py
from datetime import datetime,timedelta
a1 = datetime.today()
print('今天是=',a1)
delta2 = timedelta(days=5)
a2 = a1 + delta2
print('5天後=',a2)
delta3 = timedelta(hours=3)
a3 = a1 +delta3
print('3小時後=',a3)
程式碼內容
|
範例13-4:傳回自1970年1月1日凌晨0:0:0開始至今的秒數 |
(5).模組time(時間)
公式:
import time
t1 = time.time()
功能:傳回自1970年1月1日凌晨0:0:0開始至今的秒數
範例13-4.py
import time
t1 = time.time()
print('1970年至今的秒數=',t1)
程式碼內容
|
範例13-5:計算呼叫某個函式所需要的時間 |
範例13-5.py
目的:計算呼叫某個函式所需要的時間
import time
def func():
[i for i in range(9999999)]
t1 = time.time()
func()
t2 = time.time()
print('函式執行時間 = ', t2-t1)
程式碼內容
|
2.可以迭代(iterate)的函式庫= itertools,函式enumerate,zip,filter,map,reduce |
2.可以迭代(iterate)的函式庫
(1).種類:迭代模組或函式 = itertools,函式enumerate,zip,filter,map,reduce
(2).enumerate(a)是列舉函數(編號i,元素x)
☎功能:可以把每一個元素加上編號
☎配合list:list(enumerate(a)))
☎顯示一維串列:print((x for i,x in enumerate(a)))
☎顯示二維串列:print((x[0]+'姓名是'+x[1] for i,x in enumerate(a)))
|
範例13-6:顯示陣列 |
☎範例13-6.py
a=['tom','mike','peter','yellow']
#for顯示陣列
for i in a:
print(i)
#enumrate顯示陣列 enumerate
print([x for i,x in enumerate(a)])
#enumrate顯示陣列 enumerate
print(list(enumerate(a)))
b = (('tom','湯姆'),('mike','麥克'),('peter','彼德'))
#for顯示陣列
for i in b:
print(i)
for i in b:
print(i[0],',',i[1])
#enumrate顯示二維陣列 enumerate
print([x[0] for i,x in enumerate(b)])
程式碼內容
|
範例13-7:zip(a,b)是結合兩個可迭代物 |
(3).zip(a,b)是結合兩個可迭代物件
☎功能:結合兩個可迭代物件,對應結合成一個新的物件
☎必須配合list:list(zip(a, b)))
☎範例13-7.py
a = ['tom','mike','peter','yellow']
b = [95,85,66,75]
#結合兩個可迭代物件
c = zip(a, b)
print(list(c))
程式碼內容
|
範例13-8:模組itertools:給定起始值,遞增值,就可以產生無窮數列 |
(4).模組itertools
功能:給定起始值,遞增值,就可以產生無窮數列
☎範例13-8.py
import itertools
# itertools.count(起始值,遞增值)
nums = itertools.count(1,2)
#print(list(nums))
#結果: 1 3 5 7 9....
# itertools.cycle(資料列)
nums = [1,2,3]
newnums = itertools.cycle(nums)
#print(list(newnums))
#結果: 1 2 3 1 2 3 1 2 3....
# itertools.repeat(資料列,次數)
nums = [1,2,3]
newnums = itertools.repeat(nums,2)
#print(list(newnums))
#結果: [[1,2,3],[1,2,3],]....
# itertools.accumulate(資料列)
nums = [1,2,3,4,5,6]
newnums = itertools.accumulate(nums)
print(list(newnums))
#結果: [1, 3, 6, 10, 15, 21]
# itertools.chain(資料列)
newnums = itertools.chain('how','are you')
print(list(newnums))
#結果: ['h', 'o', 'w', 'a', 'r', 'e', ' ', 'y', 'o', 'u']
# itertools.combinations(資料列',取n個)
newnums = itertools.combinations('ABC',2)
print(list(newnums))
#結果: [('A', 'B'), ('A', 'C'), ('B', 'C')]
# itertools.permutations(資料列',取n個)
newnums = itertools.permutations('ABC',2)
print(list(newnums))
#結果: [('A', 'B'), ('A', 'C'), ('B', 'C')]
程式碼內容
|
範例13-9:filter(過濾函數def或lambda,資料列) |
(5).過濾模組filter
公式:filter(過濾函數def或lambda,資料列)
功能:
☎範例13-9.py
#顯示偶數
a = [1,2,3,4,5,6,7,8,9,10]
b = filter(lambda x:x%2==0, a)
print(list(b))
#顯示有'o'的元素
a = ['tom','girl','man','took']
b = filter(lambda x:x.find('o')>=0, a)
print(list(b))
程式碼內容
|
範例13-10:過濾模組map |
(6).過濾模組map
公式:map(過濾函數def或lambda,資料列)
功能:
☎範例13-10.py
#顯示偶數
def getnum(x):
if x%2 ==0:
return x
a = [1,2,3,4,5,6,7,8,9,10]
b = filter(getnum, a)
print(list(b))
#顯示有'o'的元素
def getstr(x):
if x.find('o')>=0:
return x
a = ['tom','girl','man','took']
b = filter(getstr, a)
print(list(b))
程式碼內容
|
範例13-11:操作每個元素模組reduce |
(7).操作每個元素模組reduce
公式:reduce(過濾函數def或lambda,資料列)
功能:逐一操作每個元素
☎範例13-11.py
from functools import reduce
#計算總和
def getsum(x,y):
return x+y
a = [1,2,3,4,5]
b = reduce(getsum, a)
print(b)
#連接所有的元素
a = ['t','r','i','g','e','r']
b = reduce(lambda x,y:x+y, a)
print(b)
程式碼內容
|
範例13-12:套件collections-模組OderedDict:可將兩個串列,合併形成成一個字典dict |
3.套件collections
import collections
(1).模組OderedDict
功能:將兩個串列,合併形成成一個字典dict
☎比較:合併串列建立字典的兩種方法
☎範例13-12.py
import collections
a1 = ['姓名','住址','性別','電話']
b1 = ['張三','台南市忠孝東路15好','男','0912751477']
#合併串列建立字典,方法一
d1 = collections.OrderedDict(zip(a1,b1))
print(d1)
print('姓名=',d1['姓名'])
#合併串列建立字典,方法二:zip()合併兩個串列,轉成dict()
c1 = zip(a1,b1)
d1 = dict(c1)
print(d1)
print('姓名=',d1['姓名'],'電話=',d1['電話'])
程式碼內容
|
範例13-13:模組deque:操作可迭代資料列,新增,刪除,反轉 |
(2).模組deque
功能:操作可迭代資料列,新增,刪除,反轉
☎範例13-13.py
from collections import deque
a1 = [1,2,3,4,5]
#建立deque物件
d1 = deque(a1)
#反轉資料列
d1.reverse()
print('反轉=',d1)
#新增到資料列右邊 append(元素)
d1.append('R')
print('右邊新增=',d1)
#新增到資料列左邊 appendleft(元素)
d1.appendleft('L')
print('左邊新增=',d1)
#刪除資料列右邊一個 pop()
d1.pop()
print('刪除右邊1個=',d1)
#刪除資料列左邊一個 pop()
d1.popleft()
print('刪除左邊1個=',d1)
#刪除某個元素 remove(元素)
d1.remove(3)
print('刪除某個元素3=',d1)
d1.append(2)
#計算某個元素2出現的次數 count(元素)
n1 = d1.count(2)
print('計算某個元素2出現的次數=',n1)
程式碼內容
|
例13-14:模組dCounter:可計算可迭代資料列相同元素的次 |
(3).模組dCounter
功能:計算可迭代資料列相同元素的次數
☎範例13-14.py
from collections import Counter
s = 'today is a good day'
a1 = list(s)
print(a1)
#建立counter物件(字典)
c1 = Counter(a1)
print(c1)
#顯示所有『鍵』
print(c1.keys())
#顯示所有『值』
print(c1.values())
#顯示所有『元素』
print(list(c1.elements()))
#顯示所有『鍵值(tuple)』
print(c1.most_common())
程式碼內容
|
|
|
| |
| |
| chp14.存取xml,json,網路爬蟲BeautifulSoup |
|
1.存取xml:模組:xml.etree.ElementTree |
範例14-1:讀取person.xml的所有每個節點資訊,查詢所有的mail,查詢卓水信資料 |
範例14-2:讀取person.xml的所有每個節點資訊,查詢所有的mail,查詢卓水信 |
範例14-3:修改並存入xml |
|
線上XML/JSON互相轉換工具 |
2.讀取網頁:request(url) |
範例14-4:讀取網頁:web = request.urlopen(網址) |
3.存取 json(模組:json) |
|
範例14-5:轉成json:jumps。轉成dict:loads |
範例14-6:讀取網絡上的json檔案 |
範例14-7:讀取電腦上的json檔案 |
3.網路爬蟲BeautifulSoup |
|
範例14-8:讀取網頁標題 |
範例14-9:讀取網址的網頁 |
|
|
1.存取xml:模組:xml.etree.ElementTree |
1.存取xml
(1).模組:xml.etree.ElementTree
import xml.etree.ElementTree as xml
(2).讀取整個xml結構的兩種方法:
☎方法1:
import xml.etree.ElementTree as xml
tree = xml.ElementTree(file='person.xml')
root = tree.getroot()
for child in root:
...................
☎方法2:
import xml.etree.ElementTree as xml
tree = xml.ElementTree(file='person.xml')
for elem in tree.iter():
............
(3).存取xml方法
1、ElementTree例項代表整個XML樹,可以使用getroot()來獲取根節點。Element表示樹上的單個節點,它是iterable的。操作整個XML文件時使用ElementTree類,比如讀寫XML檔案。操作XML元素及其子元素時使用Element類。
2、xml.etree.cElementTree是用C語言實現的模組,介面上與xml.etree.ElementTree完全相同,然而處理效率更快,但並不是所有平臺均支援,因為我們可以嘗試匯入,若沒有就匯入ElementTree
3、每個元素包含如下屬性:
tag:string物件,表示資料代表的種類。
attrib:dictionary物件,表示附有的屬性。
text:string物件,表示element的內容。
tail:string物件,表示element閉合之後的尾跡。
若干子元素(child elements)
4、查詢方法:
Element.findall(match)方法通過tag名字或xpath匹配第一層子元素,按照子元素順序以列表形式返回所有匹配的元素。
Element.find(match)方法通過tag名字或xpath在第一層子元素中查詢第一個匹配的元素,返回匹配的元素或None。
Element.get(key, default=None)返回元素名字為key的屬性值,如果沒有找到,返回None或設定的預設值。
5、通過Element物件的方法修改Element物件
Element.text=value可以直接修改其text屬性。
Element.tail=value可以直接修改其tail屬性。
Element.set(key, vlaue)可以新增新的attrib。
Element.append(subelement)可以新增新的子元素。
Element.extend(subelements)新增子元素的列表(引數型別是序列)。
Element.remove(subelement)可以刪除子元素
6、使用ET.SubElement(parent, tag_name)可以快速建立子元素關係,使用ET.dump(elem)可以輸出elem的內容到標準輸出(elem可以是一個Element物件或ElementTree物件)
7、ET.parse(filename)一次性將整個XML檔案載入到記憶體,ET.iterparse(filename)採用增量形式載入XML資料,佔據更小的記憶體空間。
|
範例14-1:讀取person.xml的所有每個節點資訊,查詢所有的mail,查詢卓水信資料 |
☎方法1:範例14-1.py
下載person.xml
#目的讀取person.xml的所有每個節點資訊,查詢所有的mail,查詢卓水信的個人所有資料
程式碼:
import xml.etree.ElementTree as xml
tree = xml.ElementTree(file='person.xml')
root = tree.getroot()
print('根目錄的標籤名稱',root.tag)
# root.tag 讀取 tag 名
# root.attrib 讀取 attributes
# root[0][1].rank 讀取文本值
#輸出根節點元素的tag名:person
print(root.tag)
#輸出根節點元素的attributes(空值):{}
print(root.attrib)
#輸出第一個的三個子元素的值:
print(root[0][0].text)
print(root[0][1].text)
print(root[0][2].text)
#查找所有子孫元素:tag標籤 = name
for elem in root.iter('name'):
print(elem.tag, elem.attrib, elem.text)
#比較find() 和 findall()
#查找第一個子元素:find()
print(list(root.find('student')))
#查找所有子元素:findall()
print(list(root.findall('student')))
#查找所有子元素:findall()
#tree.findall('student/*') //查詢孫子節點元素
for elem in root.findall('student/*'):
print(elem.tag, elem.text)
#tree.findall('.//name') //查詢任意層次元素
for elem in root.findall('.//tel'):
print(elem.tag, elem.text)
#查詢 包含name屬性的student
#查詢tree.findall('student[@name]')
for elem in root.findall('student[@name]'):
print(elem.tag, elem[1].text)
#查詢 name屬性為卓水信的student
#tree.findall('student[name="卓水信"]')
for elem in root.findall('student[name="卓水信"]'):
print('id=',elem[0].text)
print('name=',elem[1].text)
print('tel=',elem[2].text)
#顯示 第一個student
for elem in tree.findall('student[1]'):
print(elem[0].text,elem[1].text,elem[2].text)
#顯示 第二個student
for elem in tree.findall('student[2]'):
print(elem[0].text,elem[1].text,elem[2].text)
#顯示最後一個student
#tree.findall('student[last()]')
for elem in tree.findall('student[last()]'):
print(elem[0].text,elem[1].text,elem[2].text)
#顯示倒數第二個country
#tree.findall('country[last()-1]')
for elem in tree.findall('student[last()-1]'):
print(elem[0].text,elem[1].text,elem[2].text)
#顯示第1階層所有階層的標籤名稱,屬性
print('顯示第1階層所有階層的標籤名稱,屬性:')
for child in root:
print(child.tag, child.attrib, child.text)
#顯示第2階層的標籤名稱,文字值
print('顯示第2階層的標籤名稱,文字值:')
for i,child1 in enumerate(root):
print(child1.tag,i)
for child2 in child1:
print(child2.tag, '=', child2.text)
#查詢某個tag標籤名稱
print('查詢某個tag標籤名稱:')
for elem in root.iterfind('student/mail'):
print(elem.tag,'=',elem.text)
#查詢某個tag標籤tel的所有文字
print('查詢某個tag標籤的所有文字:')
for elem in root:
print(elem.find('tel').text)
#查詢卓水信是否存在
print('查詢卓水信是否存在:方法1')
#方法1
for elem in root.findall('student[name="卓水信"]'):
if elem[1].text=='卓水信':
print(elem[1].text,'存在')
print('查詢卓水信是否存在:方法2')
#方法2
for elem in tree.iter():
if elem.text=='卓水信':
print(elem.tag,'=',elem.text,'存在')
#查詢卓水信的個人所有資料
#方法1
print('\n查詢卓水信的個人所有資料:方法1')
for elem in root.findall('student[name="卓水信"]'):
print(elem[0].text, elem[1].text,elem[2].text)
#方法2
print('\n查詢卓水信的個人所有資料:方法2')
for elem1 in tree.iter():
for elem2 in elem1:
if elem2.text=='卓水信':
print('name =',elem1.find('name').text)
print('tel =',elem1.find('tel').text)
print('mail =',elem1.find('mail').text)
程式碼內容
|
範例14-2:讀取person.xml的所有每個節點資訊,查詢所有的mail,查詢卓水信 |
☎方法2範例14-2.py
#目的讀取person.xml的所有每個節點資訊,查詢所有的mail,查詢卓水信的個人所有資料
程式碼:
import xml.etree.ElementTree as xml
tree = xml.ElementTree(file='person.xml')
root = tree.getroot()
print(root.tag)
#1.顯示所有的tag name
print('1.顯示所有的tag name')
for elem in tree.iter():
print(elem.tag, elem.attrib,elem.text)
#2.尋找某個tag name的資料 = tree.iterfind('tag name')
print("2.尋找某個tag name的資料 = tree.iterfind('tag name')")
for elem in tree.iterfind('student/tel'):
print(elem.tag, elem.attrib,elem.text)
#3.尋找某個tag attribute的資料 = tree.iterfind('tag name[@attribute]')
print('3.尋找某個tag attribute的資料 ')
for elem in tree.iterfind('student[@hash="1cdf045c1"]'):
print(elem.tag,'=',elem.attrib)
#4.#查詢卓水信的個人所有資料
for elem1 in tree.iter():
for elem2 in elem1:
if elem2.text=='卓水信':
print('name =',elem1.find('name').text)
print('tel =',elem1.find('tel').text)
print('mail =',elem1.find('mail').text)
程式碼內容
|
範例14-3:修改並存入xml |
(3).修改並存入xml文檔
☎範例14-3.py
#修改卓水信的個人id_no = 999999
程式碼:
#修改並存入xml文檔
#修改卓水信的個人id_no = 999999
import xml.etree.ElementTree as xml
tree = xml.ElementTree(file='person.xml')
root = tree.getroot()
#顯示卓水信的資料
for elem in root.findall('student[name]'):
if elem[1].text == '卓水信':
print(elem[0].text,elem[1].text,elem[2].text)
#修改卓水信的電話
elem[2].text = "0912456789"
print(elem[0].text,elem[1].text,elem[2].text)
#存檔person2.xml
tree.write('person2.xml')
#重新讀入,#顯示卓水信的資料
tree = xml.ElementTree(file='person2.xml')
root = tree.getroot()
for elem in root.findall('student[name]'):
if elem[1].text == '卓水信':
print(elem[0].text,elem[1].text,elem[2].text)
程式碼內容
|
線上XML/JSON互相轉換工具 |
線上XML/JSON互相轉換工具:
http://tools.itread01.com/code/xmljson
線上格式化XML/線上壓縮XML:
http://tools.itread01.com/code/xmlformat
XML線上壓縮/格式化工具:
http://tools.itread01.com/code/xml_format_compress
XML程式碼線上格式化美化工具:
http://tools.itread01.com/code/xmlcodeformat
更多關於Python相關內容感興趣的讀者可檢視:
《Python操作xml資料技巧總結》、《Python資料結構與演算法教程》、《Python Socket程式設計技巧總結》、《Python函式使用技巧總結》、《Python字串操作技巧彙總》、《Python入門與進階經典教程》及《Python檔案與目錄操作技巧彙總》
https://www.itread01.com/article/1535600015.html
|
2.讀取網頁:request(url) |
2.讀取網頁:request(url)
☎模組:import urllib.request as request
☎讀取網頁:web = request.urlopen(網址)
☎讀取網頁內容並解碼 = web.read().decode()
|
範例14-4:讀取網頁:web = request.urlopen(網址) |
☎範例14-4.py
程式碼:
#網路爬蟲:讀取網頁:web = request.urlopen(網址)
import urllib.request as request
url = "http://web.tsu.edu.tw/bin/home.php"
web = request.urlopen(url)
print('網址=',web.url)
print('狀態(200表示OK)=',web.status)
print('取得網頁標頭=',web.getheader)
txt = web.read()
#print('取得網頁內容(byte格式)=',txt)
print('取得網頁內容(解碼byte格式)=',txt.decode())
程式碼內容
|
3.存取 json(模組:json) |
3.存取 json
(1).模組:json
import json
(2).把字典dict轉換成json
公式:json = json.dumps(字典)
(3).把json轉換成字典
公式:字典 = json.loads(json)
|
範例14-5:轉成json:jumps。轉成dict:loads |
(4).☎範例14-5.py
程式碼:
#dict轉成json:dumps
#json轉成dict:loads
import json
#把字典dict轉成json:dumps
a1 = {'tom':'0912456789','mike':'0965258741','peter':'0965789365'}
j1 = json.dumps(a1)
print(j1)
#把串列list轉成json:dumps
a2 = [['tom','湯姆'],['mike','麥克'],['peter','彼德']]
j2 = json.dumps(dict(a2))
print(j2)
#把json(j1)轉成字典dict:loads
d1 = json.loads(j1)
print('tom tel =',d1['tom'])
#把json(j2)轉成字典dict:loads
d2 = json.loads(j2)
print('tom name=',d2['tom'])
程式碼內容
|
範例14-6:讀取網絡上的json檔案 |
(5).讀取網絡上的json檔案
☎範例14-6.py
#目的:讀取網路上一個json檔案:http://acupun.site/lecture/jquery_phoneGap/json/book.json
程式碼:
#讀取網路上一個json檔案:http://acupun.site/lecture/jquery_phoneGap/json/book.json
import json
import urllib.request as request
url = "http://acupun.site/lecture/jquery_phoneGap/json/book.json"
web = request.urlopen(url)
txt = web.read()
#txt = web.read().decode()
print(txt)
#json轉成字典
d1 = json.loads(txt)
print('第一本書 = ',d1[0]['title'], d1[0]['author'])
print('全部書籍 =')
for elem in d1:
print(elem['title'],elem['author'])
程式碼內容
|
範例14-7:讀取電腦上的json檔案 |
(6).讀取電腦上的json檔案
☎範例14-7.py
程式碼:
#讀取本機電腦上的json檔案:school.json
import json
#Python中utf-8與utf-8-sig兩種編碼格式的區別:
#(1).UTF-8以位元組為編碼單元,它的位元組順序在所有系統中都是一様的,沒有位元組序的問題,也因此它實際上並不需要BOM(“ByteOrder Mark”)。
#(2).但是UTF-8 with BOM,即utf-8-sig,則需要提供BOM。
#(3).json檔案必須獲取content再用utf-8-sig decode
f1 = open('school.json','rt',encoding='utf-8-sig')
txt = f1.read()
print(txt)
#json轉成字典
d1 = json.loads(txt)
print('第一個學校 = ',d1[0]['name'], d1[0]['address'])
print('全部學校 =')
for elem in d1:
print(elem['name'],elem['address'])
程式碼內容
|
3.網路爬蟲BeautifulSoup |
3.網路爬蟲BeautifulSoup: 讀取並分析html網頁標籤
(1).先安裝第三方函數庫,使用:pip install beautifulsoup4
下載並安裝套件
(2).讀取下載在電腦的網頁
☎#注意:這個網頁.htm,必須放在電腦檔案內,不可讀取網絡上網址的網頁
☎(正確)fin = open('web1.htm',encoding='utf-8')
☎(錯誤)fin = open('https://www.python.org/',encoding='utf-8')
☎公式
from bs4 import BeautifulSoup as soup
fin = open('網頁.htm',encoding='utf-8')
txt = fin.read()
htm = soup(txt,'html.parse')
☎讀取網頁標題
print(htm.title.prettify())
☎讀取網頁標籤
公式:BeautifulSoup.find_all(tag)
找出標籤為tag的所有元素
例如:for item in htm.find_all('tr'):
print(item)
☎讀取網頁標籤的innerHtml文字:三種方法:
for item in htm.find_all('a',href='http://epaper.edu.tw/'):
print('innerhtml內容=',item.contents)
print('innerhtml內容=',item.contents[0])
print('innerhtml內容=',item.string)
☎讀取網頁標籤
公式:BeautifulSoup.find_all(tag, attr)
找出標籤為tag+屬性為attr的所有元素
例如:for item in htm.find_all('tr',class='table_head'):
print(item)
|
範例14-8:讀取網頁標題 |
☎範例14-8.py
☎(正確)fin = open('web1.htm',encoding='utf-8')
☎(錯誤)fin = open('https://www.python.org/',encoding='utf-8')
程式碼:
#把網頁http://acupun.byethost7.com/phpexample/exp16-6-1.html',存檔成web1.htm
#用網路爬蟲,讀取這個web1.html的網頁標題
# = "http://acupun.byethost7.com/phpexample/exp16-6-1.html"
from bs4 import BeautifulSoup as soup
#讀取網頁文字檔
f1 = open('web1.html','r',encoding='utf-8')
txt = f1.read()
print(txt)
#轉成網頁
htm = soup(txt,'html.parser')
print(htm)
#讀取網頁標題
print(htm.title)
print(htm.title.prettify())
#標題名稱:htm.title.string
print(htm.title.string)
程式碼內容
|
範例14-9:讀取網址的網頁 |
(4).讀取網址的網頁:
☎範例14-9.py
#目的:讀取www.tsu.edu.tw網頁,如何顯示所有超連結的元素
#方法:找出標籤為tag的所有元素
例如:for item in htm.find_all('a'):
print(item)
程式碼:
#讀取www.tsu.edu.tw網頁,如何顯示所有超連結的元素
from bs4 import BeautifulSoup as soup
import urllib.request as request
url = 'https://acupun.site/lecture/python/index.htm'
web = request.urlopen(url)
txt = web.read()
print(txt)
#txt轉成網頁
htm = soup(txt,'html.parser')
print(htm.title)
print(htm.title.name)
#標題名稱:htm.title.string
print(htm.title.string)
#第一個<p>
print(htm.p)
#第一個<a>
print(htm.a)
#第一個<a class>
print(htm.a['class'])
#第一個<a class>的href
print(htm.a.get('href'))
#第一個<a >的innerHtml
print(htm.a.string)
#搜尋tag
#方法1:htm.find_all('a')
#方法2:htm.select('a')
#顯示所有的<a>
print(htm.find_all('a'))
#顯示所有的<a>到innerHtml
#print(htm.find_all('a'))
for item in htm.find_all('a'):
print(item.string)
#搜尋tag
#方法1:htm.find_all('a')
#方法2:htm.select('a')
#搜尋所有的<a>
print(htm.select('a'))
#搜尋 id="exp3a"
print(htm.select('#exp3a'))
#顯示id="exp3a的innerhtml
#方法1
print(htm.select('#exp3a')[0].string)
#方法2
for i in htm.select('#exp3a'):
print(i.string)
#搜尋第二個<a>
print(htm.select('a')[1])
#搜尋第二個<a>的href
print(htm.select('a')[1].get('href'))
#搜尋第二個<a>的id
print(htm.select('a')[1].get('id'))
#搜尋第二個<a>的innerHtml
print(htm.select('a')[1].string)
程式碼內容
|
| |